November 2, 2020
(last updated October 22, 2022) This vegan butternut red onion pizza is a perfect fall appetizer or flavorful meal. Full of sweet and savory flavors and topped with creamy cashew cheese and zippy arugula!
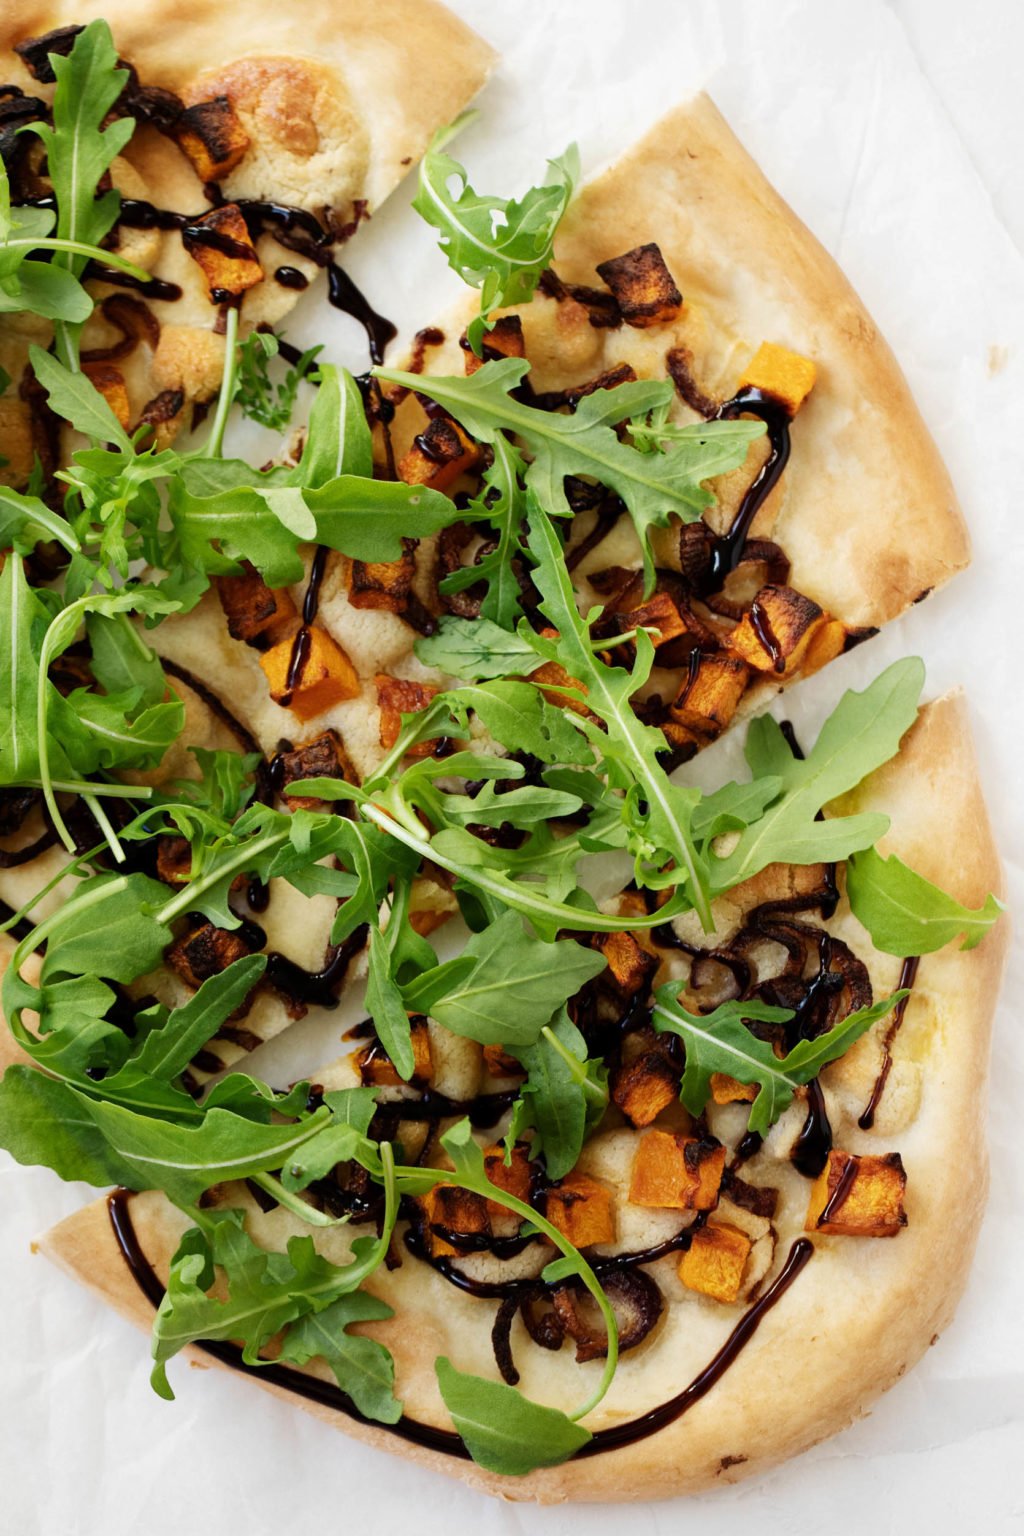
I made this vegan butternut red onion pizza a few weeks ago, and I can’t wait to make it again. I’d call it a perfect autumn appetizer, if I were having people over these days. In the meantime, it’s a wonderful plant-based meal for the season.
The perfect combination of savory + sweet
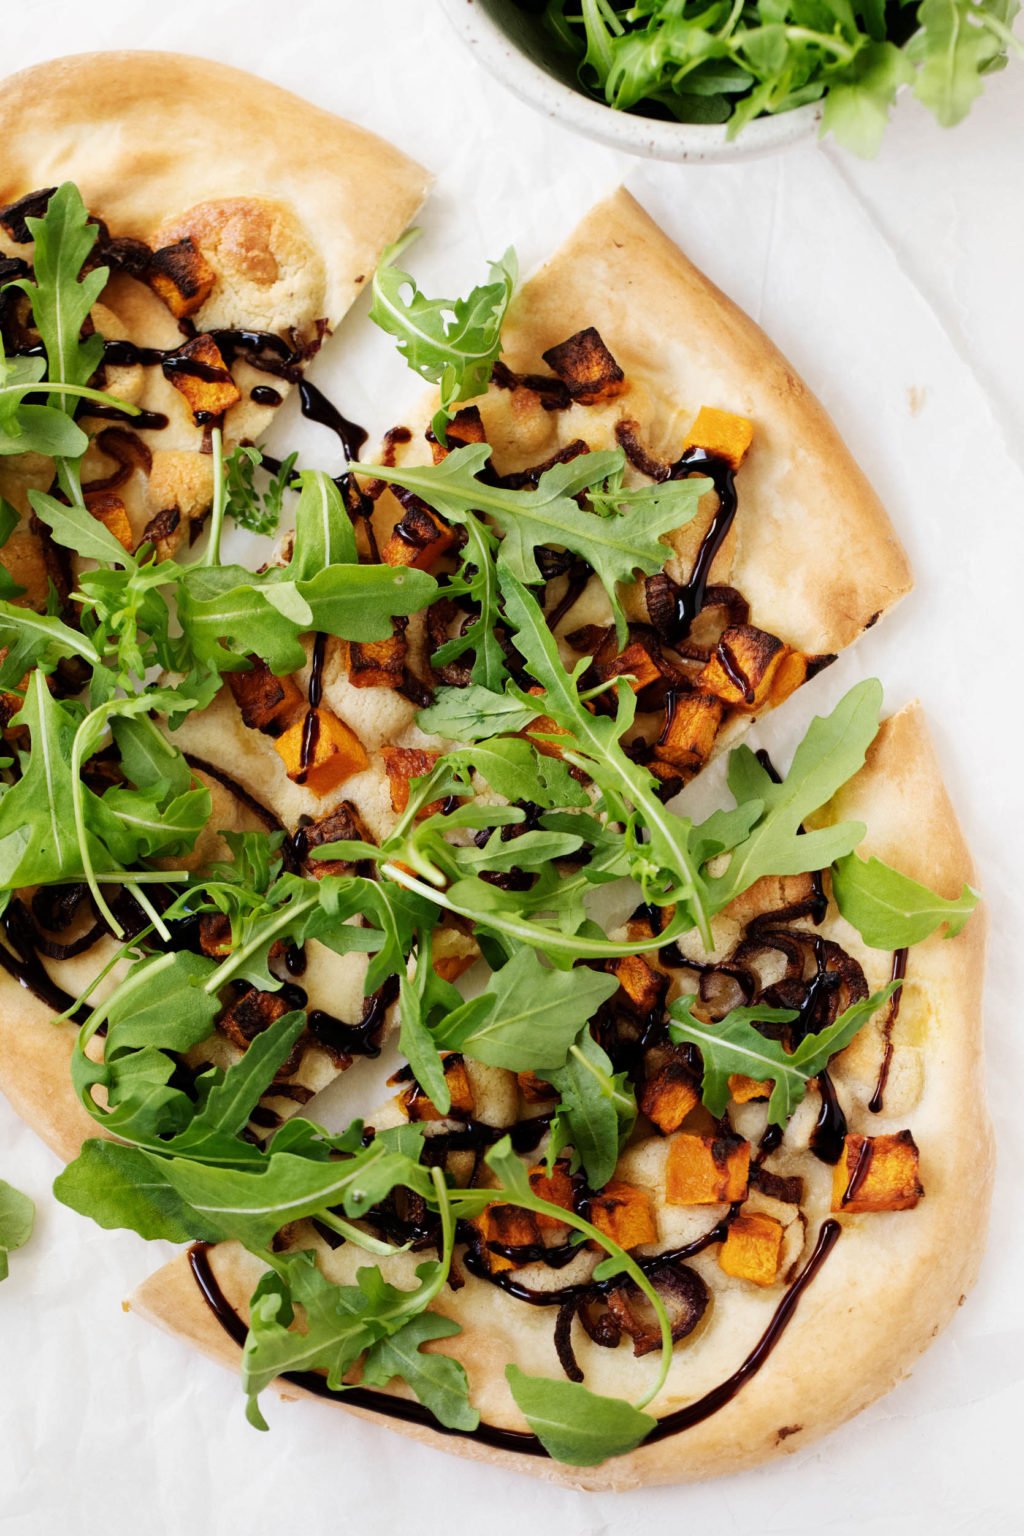
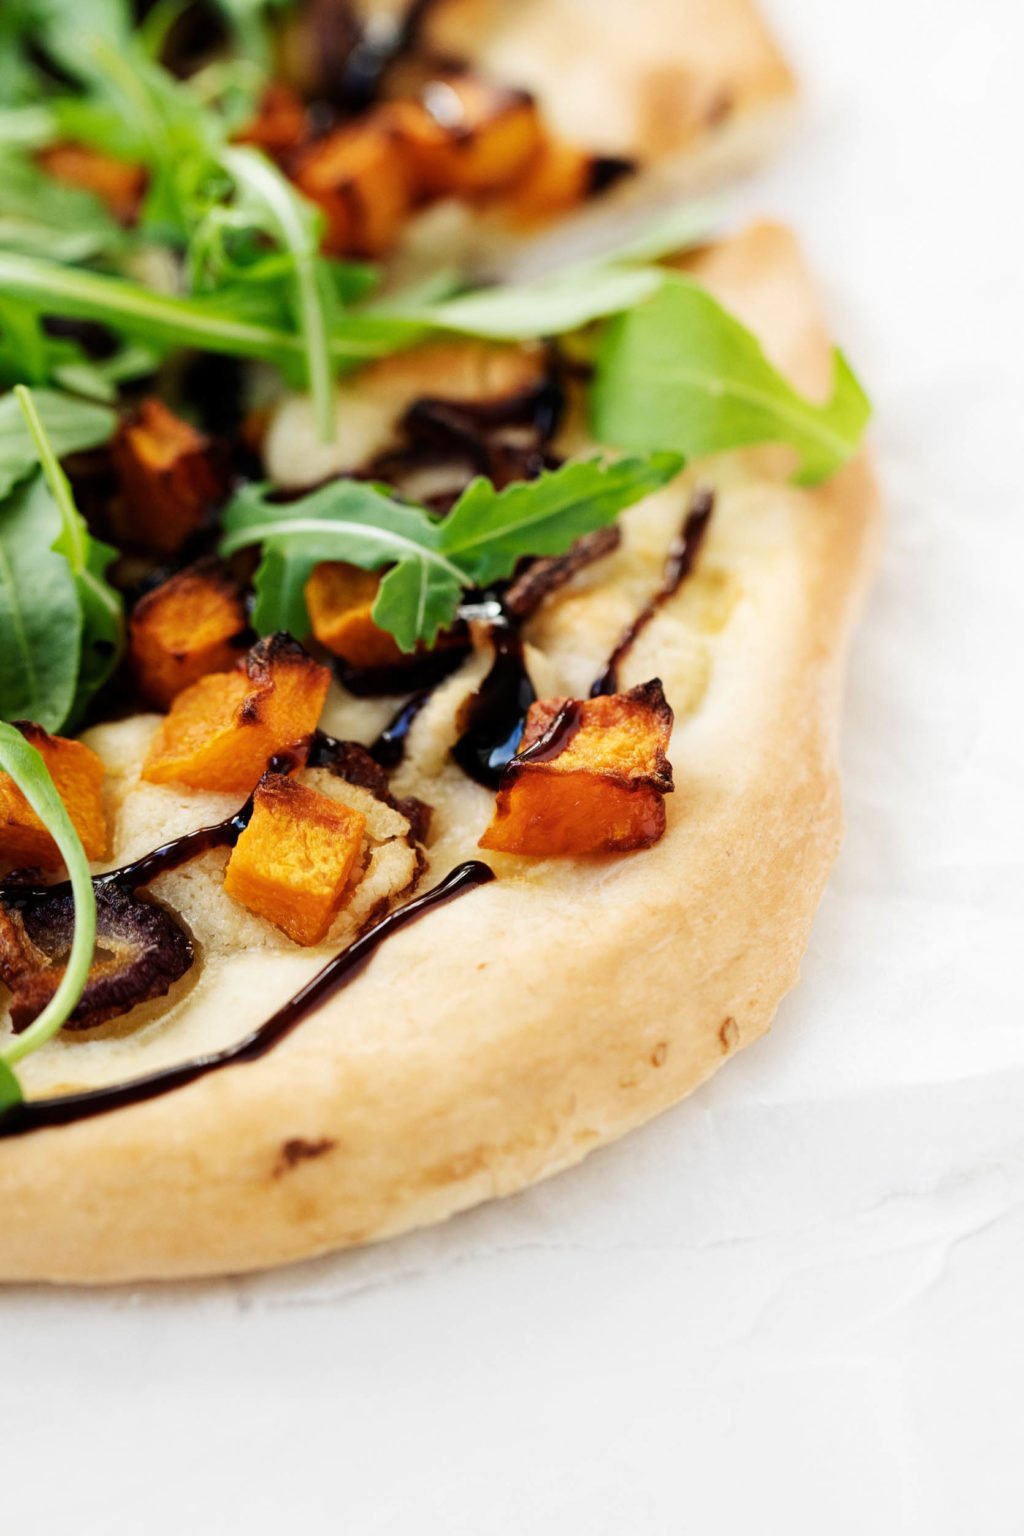
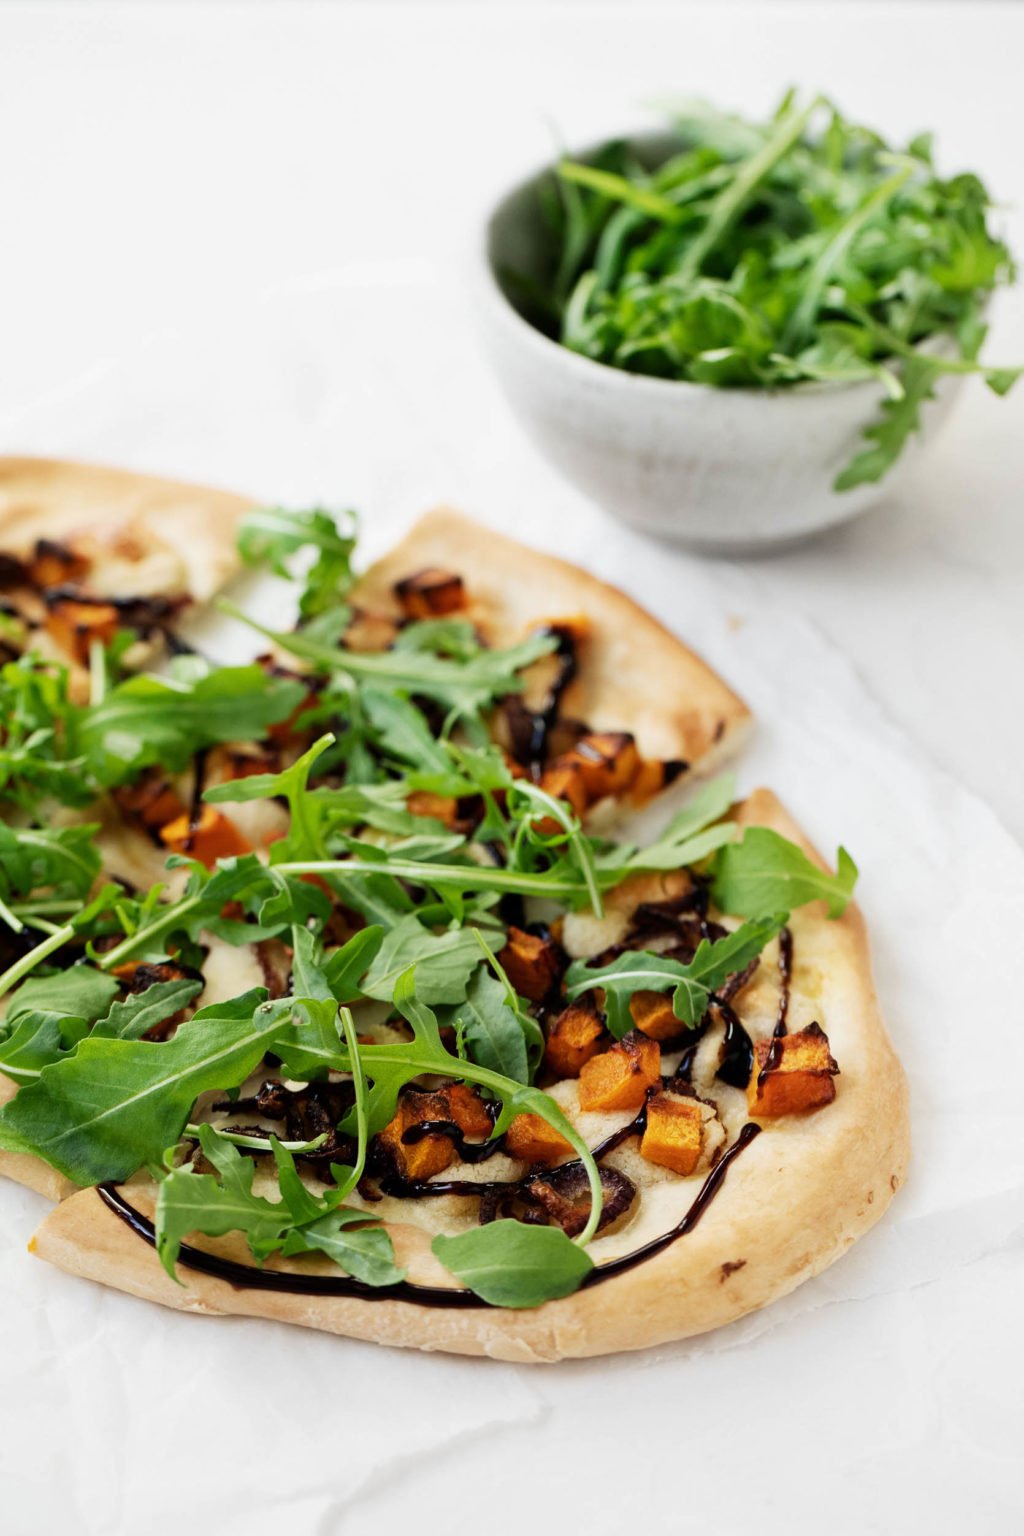
This pizza brings to life my favorite flavor combination of savory and sweet. The butternut squash and caramelized onions impart sweetness, while the cashew cheese adds umami and saltiness. The arugula adds a fresh, peppery bite. And the balsamic drizzle is an added kick of sweet, tangy flavor.
I love traditional margherita pizza, and my green goodness pizza is another go-to around here. But I’m really enjoying the untraditional flavors and textures of this pie. It’s beautiful and colorful to look at, and the experience of eating it is so satisfying. It feels abundant, as harvest season recipes should.
Tips for your homemade vegan pizza dough
Bread making is now a well-established, cherished ritual in my home, but it wasn’t always that way. Long before I was baking up peasant bread, sandwich bread, and even multigrain loaves of my own, I was terrified of anything yeasted.
I was able to get over my fear of pizza crust well before I attempted bread, though. And if I can do it, I promise you can, too. Yeast isn’t as scary an ingredient as it seems, and it’s so rewarding to make your own crust for pizza. If you’re dying to make this butternut red onion pizza but the thought of homemade dough is getting in your way, it doesn’t have to! Here are some encouraging tips:
Use a stand mixer, if you have one
Theres a lot to be said for the joys of kneading bread by hand. Kneading has taught me a lot about bread-making. It’s given me clues about how dough should look and feel at every stage of gluten development. And there’s nothing quite like the silky feel of bread that’s been kneaded for just enough time.
Even so, kneading can be time-consuming. On a busy day, the thought of having to knead by hand is enough to deter me from making pizza dough or bread at all. Taking shortcuts in the kitchen is part of my process of unlearning perfectionism. The result is usually that I cook more, rather than getting overwhelmed and not cooking at all.
Kneading dough in a stand mixer is easy and fast. It dirties less counter space than kneading by hand. If you have a stand mixer with a dough hook, now is the time to use it. It’s also an option to knead dough in a food processor, though I’ve never tried it.
Flour your surface and hands well
My main challenge when I started to knead bread was that I didn’t adequately flour my hands and counter space. My bread was always sticking to my fingers and the surface I was kneading on. This kept me from finding the soothing rhythm that emerges during kneading, which makes the process pleasurable.
I always keep a container of flour nearby while I knead. This allows me to flour my hands as often as I need to, especially if the dough is wet. I also like to keep my dough scraper handy in case the dough starts sticking to my counter.
Watch a few videos (or read a few guides)
There’s nothing like a quick video tutorial for bread (or dough) kneading instruction. Kneading is a process that becomes easier through practice, but watching someone else do it once or twice will help you to know what to expect. I really like this one from King Arthur Baking.
It’s also helpful to read about bread-kneading. I learned through Molly Katzen’s descriptions of how to knead in The Enchanted Broccoli Forest. Her encouraging tone helped me to conquer my fears. I’d recommend that book for its bread tutorial, in addition to many other wonderful recipes.
While not a bread book, the Fannie Farmer Cookbook also has some good, introductory bread making instructions. It’s appropriate for beginners, and the book is a fun one to veganize from in general.
And if you don’t have time to make dough…
…you can use store-bought dough, if that’s available. Or flatbread. Or a gluten-free crust. You can even bake this recipe on a whole grain vegan tortilla. Don’t let perfect be the enemy of the pizza!
Substituting active dry yeast for instant
SAF instant yeast is my go-to for baking. I find that it’s faster and easier to mix all of the bread (or dough) ingredients than to dissolve my yeast in liquid beforehand.
If you don’t have instant yeast, though, don’t worry. Simply dissolve the yeast in the warm water and oil and let it sit for 5-10 minutes (or until it’s active and a little bubbly) before mixing the dough. This post has more tips on swapping one type of yeast for another.
Meal prepping butternut red onion pizza
This butternut red onion pizza is a great candidate for meal prep. If you make it without preparing anything in advance, the pizza is a bit of a project. A delicious project, but still.
If you make the cashew cheese, roast the squash, caramelize the onions, or do some combination of these steps ahead of time, the pizza will come together more easily. When I made the pizza, I prepared a double batch of cashew cheese in advance. I used some for toast, salads, and freezing. I used the rest for this pizza.
The following day, I roasted my squash and caramelized my onions. A day after that, I prepared my dough, topped it with all of my toppings, which were ready to go, and baked it. By the time I pulled my pizza from the oven, it felt like an easy and low-stress meal.
I know that piecemeal food preparation isn’t everybody’s style. But as someone who does better with small, consistent baby steps than with big pushes of effort, it helps me to prepare complex meals without feeling overwhelmed.
Substituting homemade cashew cheese
My go-to cashew cheese is one of the homemade staples I rely on most. Whereas there are some staples that I’m happy to purchase, like marinara sauce, cashew cheese is one that I find fun and rewarding to make. And I use it often enough that preparing it from scratch and freezing it is more economical than purchasing.
Even so, there are so many good vegan cheeses these days. For this pizza, you could use a soft, goat-cheese style option like Treeline Cheese or Kite Hill Ricotta. Miyoko’s mozzarella is also excellent for pizza (my choice for margherita, if I don’t feel like preparing my own vegan cheese).
You can substitute a vegan cheese that you love and have an easy time finding to help save time with the butternut red onion pizza. In a pinch, you can even omit the cheese and dust vegan parmesan on top.

Vegan Butternut Red Onion Pizza
Author –Yields: 6 servings
Ingredients
For the crust
- 3 cups (360 g) bread flour
- 1 1/2 teaspoons kosher salt
- 2 teaspoons (7 g) instant yeast
- 2 tablespoons (30 mL) olive oil, plus extra for coating your bowl during the bulk rise
- 1 1/4 cups (255 g) warm (but not hot) water (about 110F)
For the pizza
- 2 tablespoons olive oil, divided
- 1 medium butternut squash, halved, seeded, peeled, and cubed (about 1 1/4 lb/568 g after preparation)
- 2 large red onions, thinly sliced
- kosher salt and freshly ground pepper
- 1 tablespoon balsamic vinegar, plus extra for drizzling
- 1/2 cup cashew cheese
- 2 big handfuls baby arugula
Instructions
- To prepare the pizza crust, mix together the flour, salt, and yeast in a mixing bowl. Stir together, then add the water and oil. Use a spoon to mix everything into a shaggy dough ball. Cover the bowl with a damp dish towel and let it rest for 5 minutes.
- Turn the dough out on a floured surface and knead it a few times. Continue to knead the dough for 8-10 minutes, or until it’s smooth, pliable, and resistant to tearing when stretched. Alternately, you can mix and then knead the dough in a stand mixer fitted with the dough hook. It should take about 5 minutes on medium low speed.
- Transfer the dough to a large bowl that’s been coated well with olive oil. Turn the dough once to coat, then cover. Allow the dough to rise for 60-90 minutes, or until it’s roughly doubled in size.
- In the meantime, prepare the squash and onions. Heat the oven to 400F and line a baking sheet with parchment. Place the butternut squash on a baking sheet and drizzle 1 tablespoon of the olive oil over it. Use your hands to coat the squash well. Sprinkle the squash with salt and transfer it to the oven. Roast for 30 minutes, or until the squash is golden at the edges and tender. Remove the squash from the oven and set it aside till you’re ready to assemble the pizza.
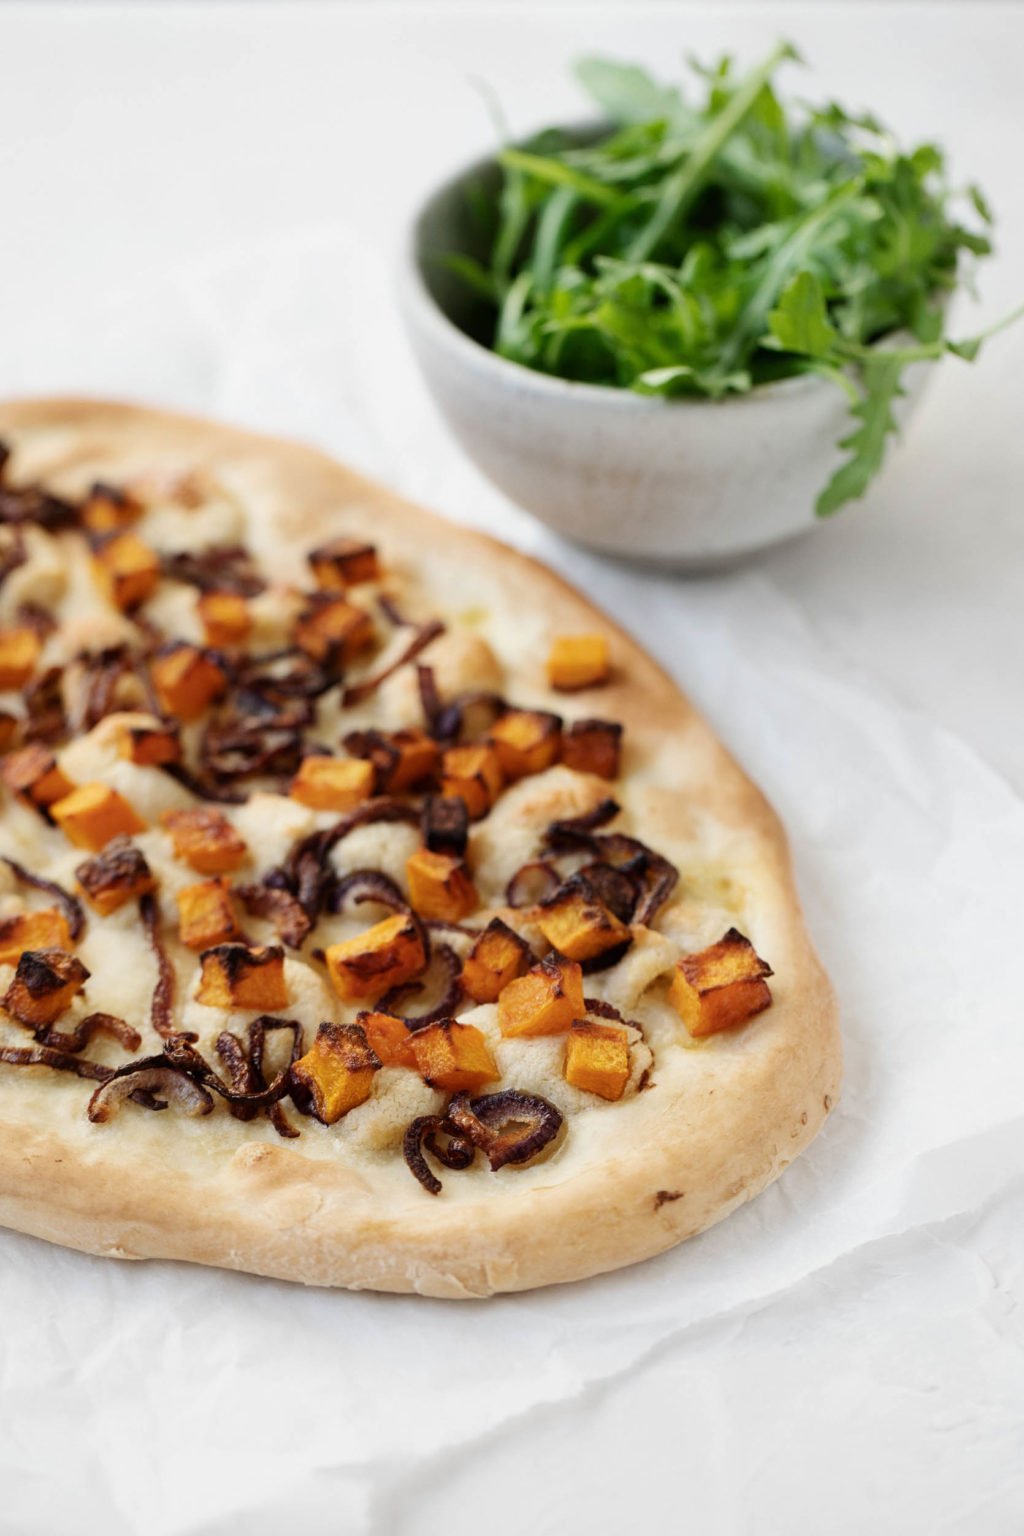
- Heat the remaining tablespoon oil in a large, deep skillet over medium heat. Add the red onions and a generous pinch of salt. Sauté the onions for five minutes over medium heat, then reduce the heat to low. Continue sautéing the onions for another 5-8 minutes, stirring frequently, until they’re greatly reduced in volume and taste very sweet. They should be lightly caramelized. Stir in the tablespoon of balsamic vinegar and set the onions aside.
- Raise the oven heat to 500F. If you have a pizza stone, set it in the oven (use long oven its to protect your forearms!). If not, transfer a baking sheet to the oven now.
- Punch the dough down. Divide it into 2 pieces on a floured work surface. Use a floured rolling pin to roll each into a circle about 12-14 inches in diameter. As you roll the dough, you can also pick it up and stretch it gently to help it widen into a circle.
- Place your first circle of dough onto a round or square piece of parchment. If you have a pizza peel, place the parchment onto the peel. Spread half of the caramelized onions onto the pizza crust, followed by half of the squash. Finally, dot the pizza with half of the cashew cheese. Wearing long oven mitts, use your peel to transfer the parchment and pizza onto your pizza stone or baking sheet. Alternatively, very carefully transfer the parchment and pizza into your oven.
- Bake your pizza for 15 minutes, or until the crust is puffy and browning around the edges. I recommend checking on its progress at 12 minutes. Repeat with the other round of dough and toppings. Top the warm pizza with a handful of fresh baby arugula and another drizzle of balsamic, if you like. Slice and serve!
Storing butternut red onion pizza
You can store slices of this pizza in an airtight container in the fridge for up to four days. If you plan to store it for that long, you can store slices before topping them with the arugula and balsamic drizzle. This will help to keep the fresh. When you’re ready to eat, simply add the arugula and vinegar and enjoy.
Reheat pizza slices on a lined baking sheet in an 350F oven for about ten minutes. I’ve recently learned that air fryers are also perfect for reheating pizza leftovers.
I went through a considerable Covid cooking rut this summer. For weeks at a time, all I could do was make sandwiches and pasta with Gardein meatballs and not-homemade marinara for dinner. That was OK. We do what we need to do from week to week, and that’s never been more true than it is in 2020.
With fall weather returning, I’m feeling inspired to cook again. The sight of winter squash at the farmers market is encouraging me. This butternut red onion pizza is the first recipe I’ve made in a while that asked me to roll up my sleeves and spend some real time in the kitchen.
It felt good, and I hope the pizza will bring some joy to you, too.
A big day tomorrow. Wishing you all as much peace and hope as you’re able to hang onto. A big hug from me,
xo
This post may contain affiliate links. If you use these links to buy something I may earn a commission. Visit my privacy policy to learn more.
Categories: Recipes,
Main Dishes
Method: Oven
Ingredients: Butternut Squash
Dietary Preferences: Soy Free, Vegan
Method: Oven
Ingredients: Butternut Squash
Dietary Preferences: Soy Free, Vegan


Leave a Comment
This is a super helpful post on all things dough and the whole recipe sounds divine! I love that you took the time to write out tips for making homemade dough as that is something I have struggled with for a while! Will definitely be trying this recipe 🙂
Gena, this pizza looks so good! I tried the pizza recipe. It was not what I expected, I did not get the exact cooking time. I am sure that after a few tries I will be able to do this according to the exact recipe. Thanks again, I’m following you. I’m looking forward to your new recipes 🙂
Gena, this pizza looks beautiful! I go through periods of making myself personal pizzas sometimes once a week. I love butternut or other winter squash on my pizzas. I sometimes spread it as “the cheese.” There’s nothing like yeasted pizza dough, and I’ve made that a lot in my life but these days I do easy gluten free ones–there’s a good one on Forks Over Knives. And when I’m really lazy I mix chickpea flour and water and a little baking soda and cook it like a flatbread then put the toppings on and cook some more. I like that your pizza is not a slave to tomato sauce. 🙂 Really impressed with your bread making accomplishments over time. And here’s to plan ahead baby steps! xoxo