May 4, 2024
This recipe for vegan koulourakia will allow you to create the beloved Greek Easter cookies without dairy or eggs! These cookies have become a part of holiday celebrations within my small, Greek American family, and I hope that you’ll love their buttery taste and tender texture as much as I do.
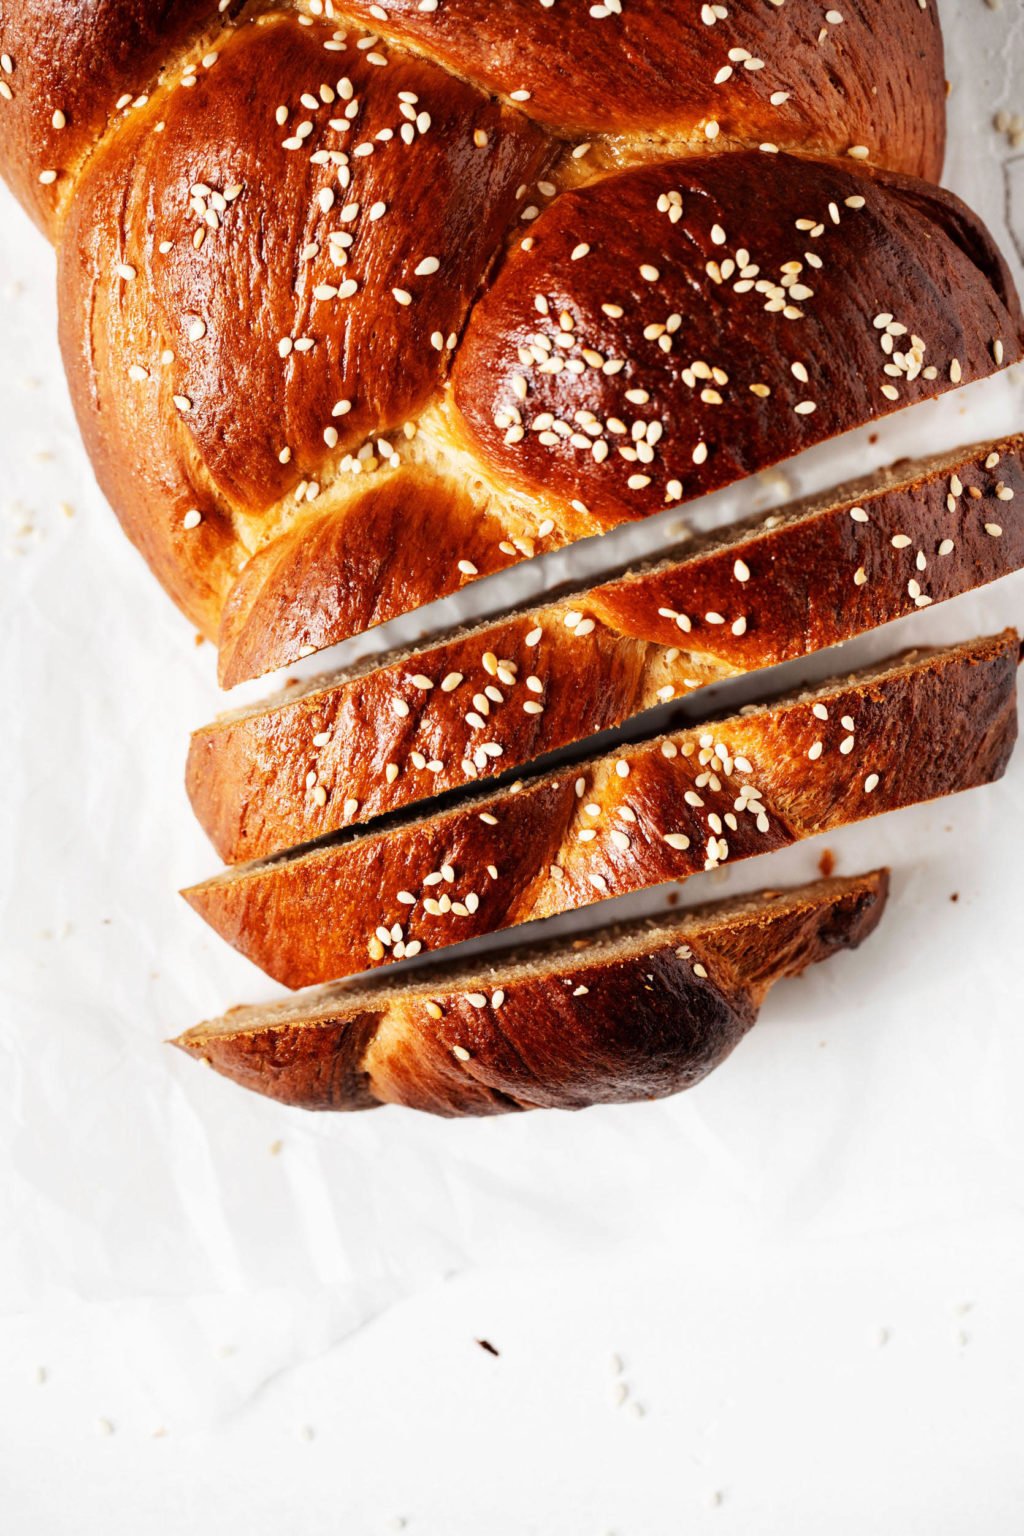
When I was growing up, Greek Easter weekend was a time for staying up past my bedtime, exclaiming “Christos Anesti!” at midnight, and stuffing myself happily with bowls of avgolemono and tsoureki bread.
It was also a time for koulourakia. Koulourakia are braided Greek butter cookies. They’re associated with Pascha, or Easter, but they can be enjoyed year round as part of celebrations.
Family friends would bring tins of homemade koulourakia to my grandmother’s apartment, or they’d purchase them by the pound in Greek bakeries around the city.
As a result, there would be silver tins full of koulourakia lying around for the whole Easter week.
I can still remember opening the cookie boxes, getting a whiff of buttery sweetness, and helping myself to a mini-braid or two during long Sundays at my Grandmother’s.
In adulthood, I’ve created plant-based versions of avgolemono soup and tsoureki bread. This year I thought it was about time to add a recipe for vegan koulourakia to that collection of holiday fare.
After much experimentation, I’ve found vegan koulourakia that will help me and my mom to keep tradition ongoing.
What are koulourakia?
Koulourakia are sweet, vanilla-scented, buttery cookies.
They’re a little hard to define in that they don’t line up neatly with many of the most popular cookie varieties out there.
Koulourakia aren’t as crunchy or buttery as shortbread. They’re quite a bit less sweet than American sugar cookies; you can think of them as being moderately sweet.
The texture of these cookies is hard to pinpoint because it can vary from recipe to recipe. I’ve had some koulourakia that were quite crispy and others that were almost bread-like in their softness.
The vegan koulourakia that I’m sharing today have a texture that’s similar to the cookies that I grew up with: fluffy and tender, but not quite soft and chewy.
Figuring out how to achieve this texture was a challenge! Many sticks of butter and cups of flour were sacrificed in cookie trials that ended up being too tough, too flat, too crunchy, too bread-like.
Finally, I landed on a recipe that I really love.
What makes these koulourakia vegan?
The trick to making vegan koulourakia—as with tsoureki, and as with many types of cookies—is to use vegan butter and an egg replacer of some kind.
It sounds so simple, right? Yet both replacements can prove tricky in baking, especially the task of finding the right egg substitute.
To be honest, I think that there are many baked goods in which replacing egg isn’t necessary. I routinely make quick breads—pancakes, waffles, loaves, muffins, cakes—without using flax egg, aquafaba, Ener-G, or any other egg replacer.
When it comes to cookies, it really depends. Some cookies do well with aquafaba as an egg replacer, while flax meal works better for others.
It took me some time and experimentation to create vegan koulourakia that have as much tenderness and structure as traditional cookies with egg would have.
In the end, I opted to use aquafaba, which helps the cookies to remain fluffy and light while also giving them structure.
Working with aquafaba
Most of my readers are familiar with aquafaba, and I know that some of you are aquafaba baking pros. If this ingredient is new to you, here’s a quick explanation.
Aquafaba is the canning brine, or “chickpea water,” that comes in a can of chickpeas along with the beans.
Very often we discard this liquid, but it can be used as a versatile and very effective egg replacer.
Aquafaba is the best vegan egg substitute that I’ve tried for more delicate baked goods, such as cakes and sugar cookies.
Thanks to its protein content, aquafaba whips up very similarly to egg whites. It can even be used to make an authentic vegan pavlova or macaroons.
You can use the cooking water from dried chickpeas that have been boiled at home to make aquafaba, but I’ve never tried this process.
I work with canned beans in my kitchen, so I’ve only ever used aquafaba from a can of beans.
So far, I’ve used many brands of canned chickpeas, and I’ve yet to find that one of them didn’t work. My only advice is to us a low-sodium can of chickpeas, so that your aquafaba doesn’t have an assertively salty flavor when you bake with it.
Is there a specific type of vegan butter that I should use?
I tend to think that it’s easiest to measure and bake with a variety of vegan butter that comes in stick form, rather than in a tub.
So, I’d suggest a vegan butter brand that makes butter sticks, such as Earth Balance, Miyoko’s Creamery, or Country Crock Plant Butter.
Within that, you can use the brand that aligns best with your preferences and budget. I usually bake with original Earth Balance sticks, which are a little salty, so if I translate a choose another brand of butter I try to use one that is not unsalted.
Speaking of butter, that too was a matter of trial and error. My vegan koulourakia have slightly more butter than some traditional recipes, which is a choice that I made when test batches were consistently too dry and not rich enough.
What I realized is that aquafaba replaces the structure usually given by egg whites, but not the fat of egg yolks. I needed to add a little extra vegan butter to help compensate for this change.
They say butter makes everything better, and whether or not that’s true, it’s true for this recipe!
How to make vegan koulourakia
Koulourakia aren’t difficult to make, but they do unfold in stages.
If the recipe as written looks a little daunting, don’t worry. These cookies are actually fun to shape and twist, and the sweet, buttery, fragrant final product is well worth your effort and patience.
Step 1: Whisk together the dry ingredients
Those ingredients are simple: all purpose flour, baking powder, and salt.
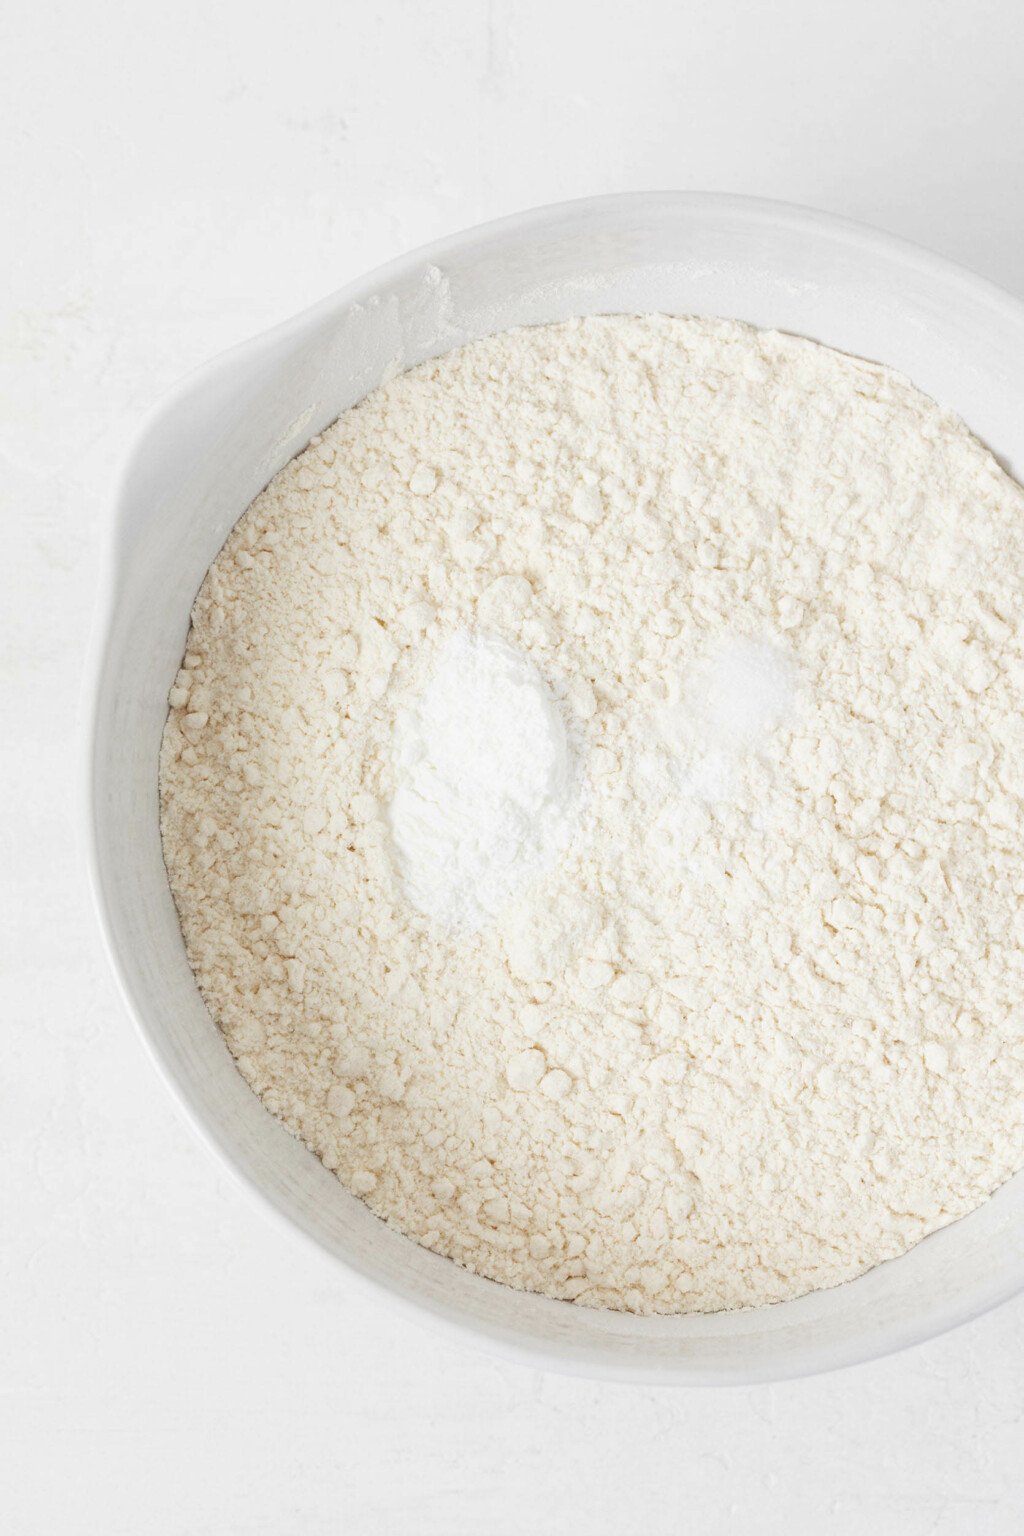
You’ll be pouring these dry ingredients either into a stand mixer or into another bowl, so you may wish to use a mixing bowl with a spout.
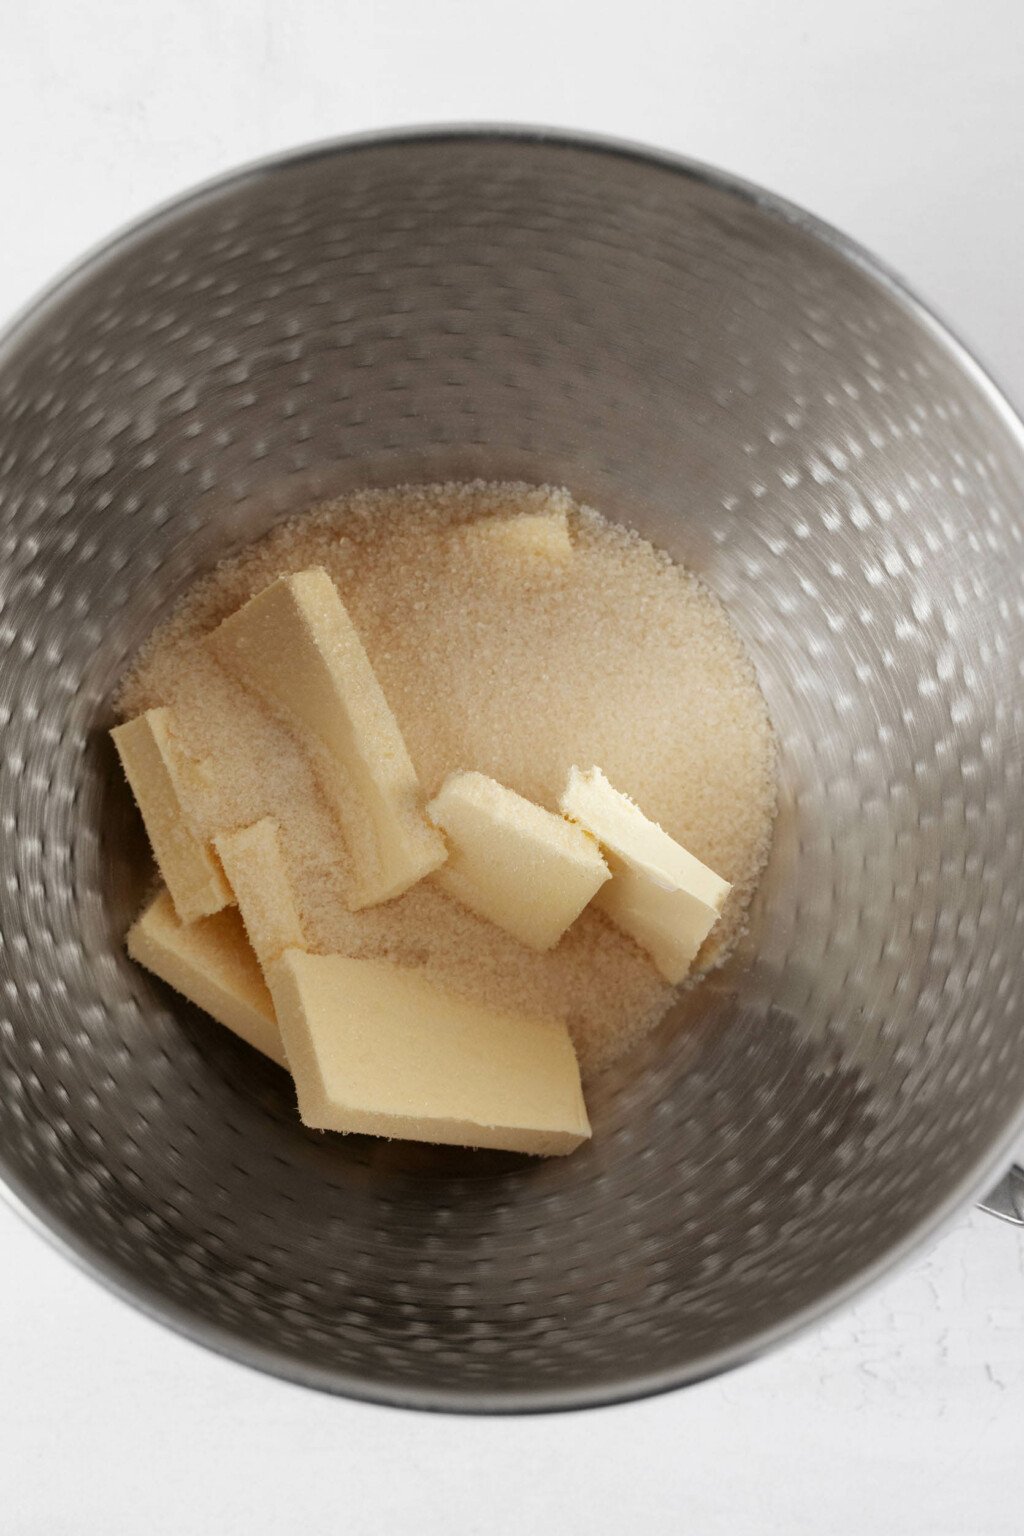
Step 2: Cream butter and sugar
Next, you’ll cream butter and sugar in the bowl of a stand mixer, or you’ll use a handheld mixer on low speed for the job.
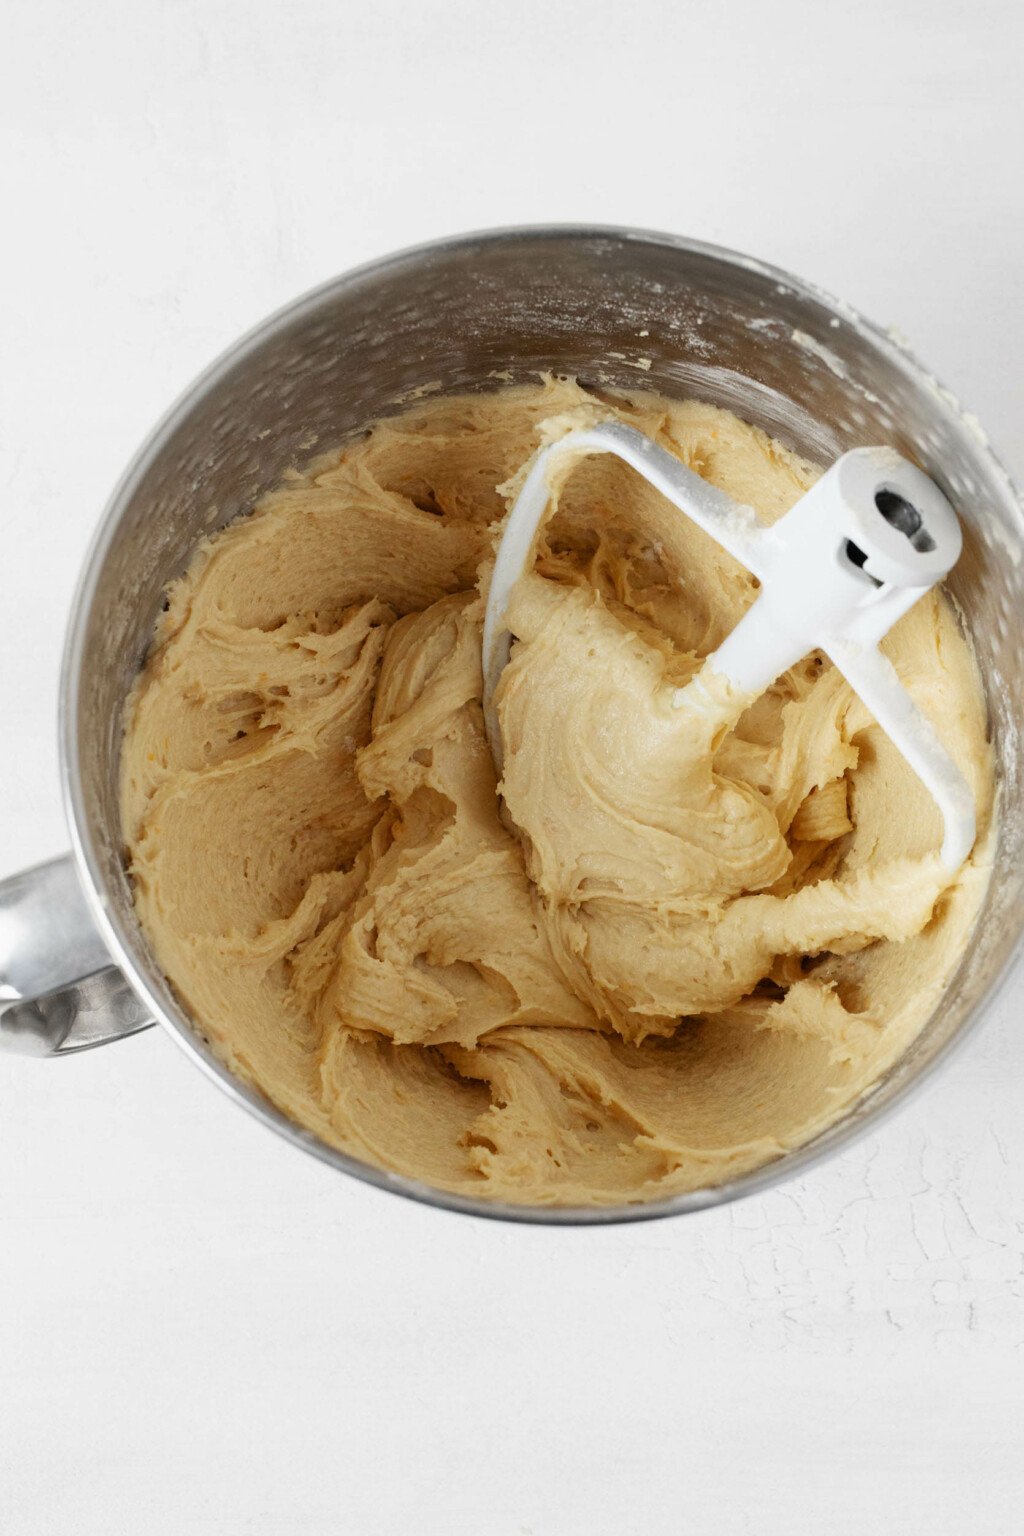
I used to get confused about what “creaming” butter and sugar actually was. Was it different from simply mixing?
Creaming is really just a process of mixing butter and sugar together for long enough that the sugar becomes evenly dispersed into the butter. Creamed butter and sugar should be pale yellow, light, and fluffy.
If you over-cream butter and sugar, they might start to look loose and greasy. This is a mistake that I’ve made many times over!
It’s a little easier to over-cream the mixture if you use a handheld mixer than a stand mixer—slower mixing is trickier that way.
I recommend 2-3 minutes of mixing on medium low speed by hand or 3-4 minutes of mixing with the paddle attachment in a stand mixer on medium speed for good results.
Step 3: Add the other wet ingredients to the stand mixer
These other wet ingredients are the aquafaba, vanilla extract, orange flavor or zest, and a half cup (120 ml) non-dairy milk. I usually bake with plain soy, oat, cashew, or almond milk.
A word about the orange flavor : this is similar to an extract. It’s typically either an infused alcohol or oil, and helpful for lending orange scent and flavor to baked goods. It’s sort of a niche ingredient, and many of you won’t have it at home.
Many koulourakia recipes call for a touch of orange juice or zest (or both). The koulourakia that I grew up with did have a faint hint of orange flavor, as well as lots of vanilla notes.
I love using orange and lemon flavor when I want to make citrus-scented cakes or cookies. Extracts and flavorings are easy to work with and precise.
Orange flavor is lovey in cakes, quick breads, and muffins, so it’s a versatile little jar to invest in, if you’re curious.
If orange flavor isn’t an ingredient that you want to keep at home, then you can substitute two tablespoons of orange zest.
After you add this group of ingredients to the mixer, you’ll mix them on low speed for another half minute. The aquafaba and milk will be wet and messy, which is OK.
Step 4: Add the dry ingredients to the mixer
Next, you’ll add the dry ingredients to your mixer. You may need to do this bit by bit. Your mixer should remain on low speed the entire time.
Continue mixing on low for another couple minutes, or just until the dough is fully incorporated. If you over-mix, the cookies will be tough, so try to stop the mixture as soon as the dough is really cohesive.
The dough will be soft and sticky at this point. Don’t worry—you’ll be chilling it before you try to shape the cookies.
Step 5: Chill the dough
I can’t emphasize enough how important this step is!
Chilling dough helps to hydrate the flour, which in turn leads to tender, chewy texture. It also makes the dough easier to shape, and it ensures that the cookies won’t spread and flatten too much during baking.
You’ll need to cover and chill the vegan koulourakia dough for at least two hours. Up to overnight in the fridge is totally fine.
When I make these cookies, I nearly always do so over the course of two days: making the dough on day one, and shaping the cookies and baking on day two.
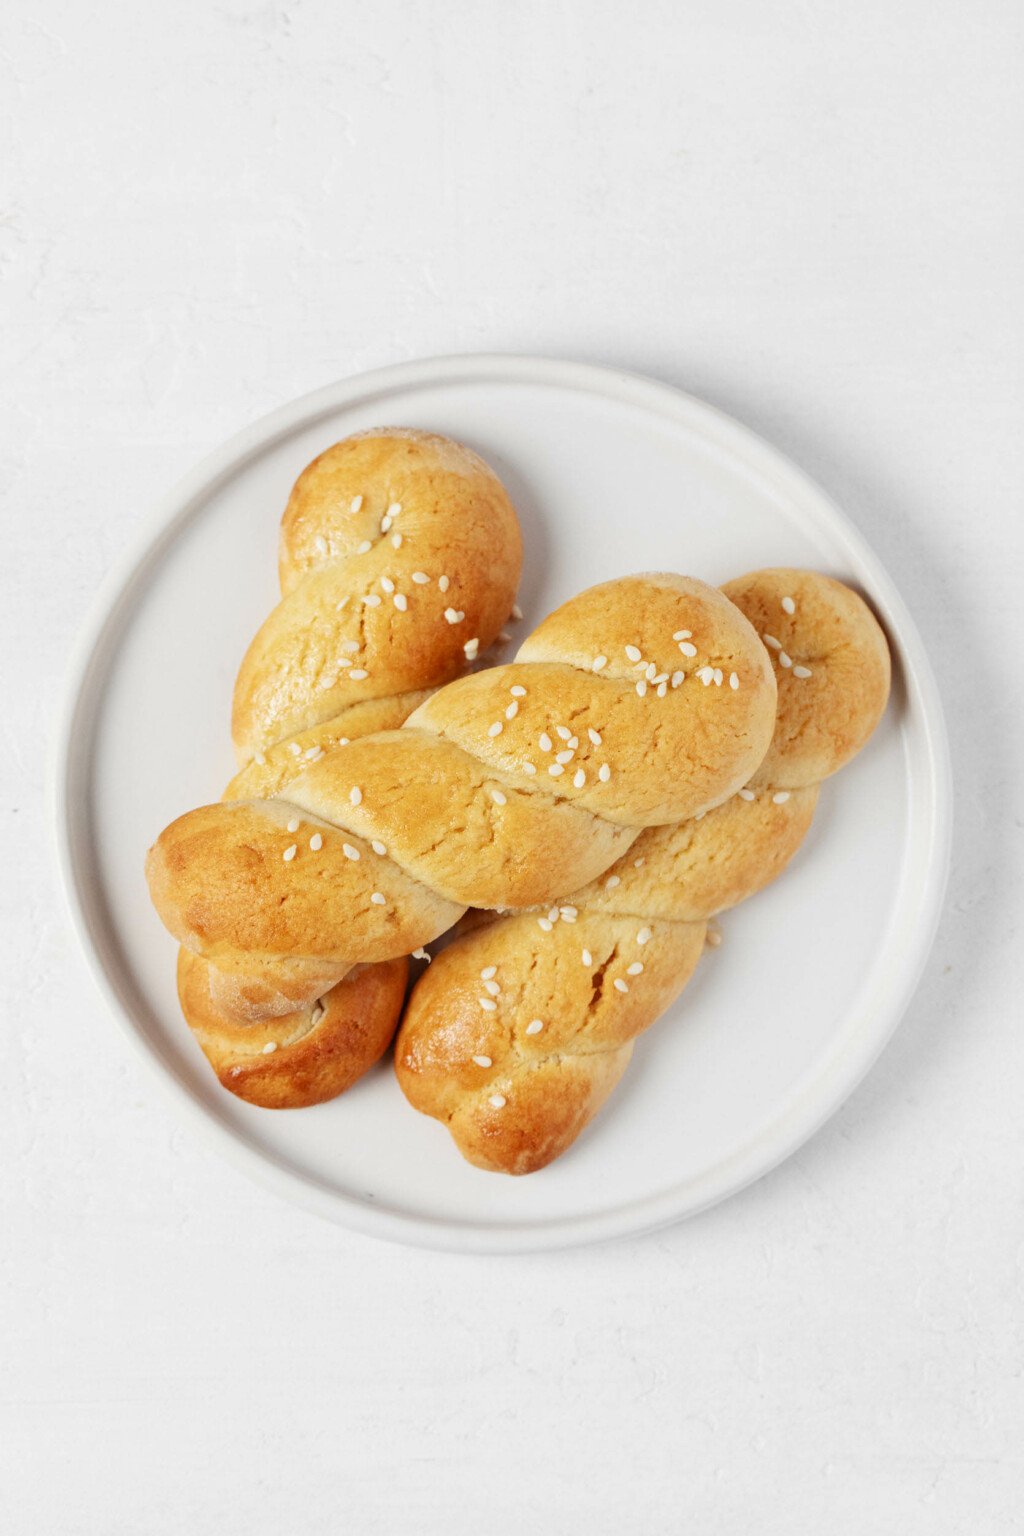
Step 6: Shape the cookies
These cookies require shaping, but it’s the fun kind of dough shaping: imprecise, playful, and with no rolling pin or cookie cutters required.
To shape the koulourakia, you’ll lightly flour a clean, flat work surface.
Gather up the dough a few tablespoons at a time. Roll the dough into a rope that’s about 8-in / 20cm long.
Fold the rope in half, then twist it to form a twisted rope shape.
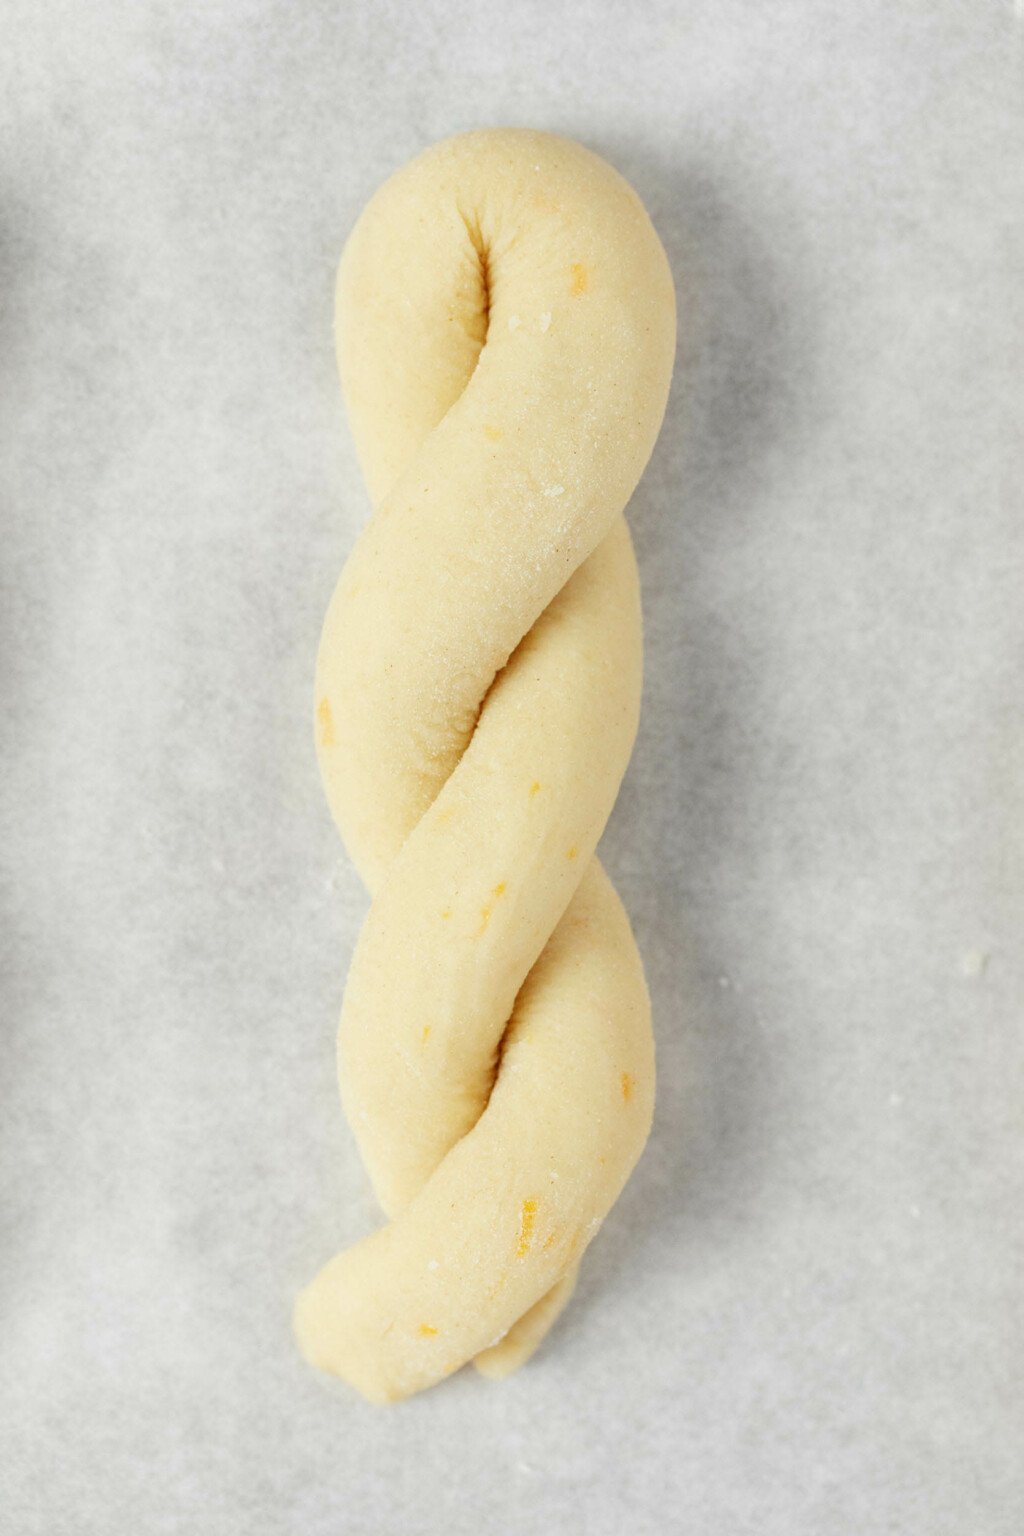
Transfer the cookie to the baking sheet, and then repeat this process with all of the remaining dough.
Be sure to space the cookies at least 1 inch / 2.5cm apart on the baking sheet.
Step 6: Brush the cookies with vegan “egg wash”
Whereas aquafaba helps to replace egg on a technical level, a 1:1 mixture of maple syrup and non-dairy milk helps to replace egg on a decorative level!
This mixture is an easy, all-purpose glaze that can stand in for egg wash when baking bread or cookies. It gives the vegan koulourakia a polished appearance and helps the optional sesame seed garnish to stick.
You’ll actually brush the cookies twice: once prior to baking and once more during baking. This ensures that they’re nicely and evenly glazed.
Step 7: Bake
Bake the cookies in a 375°F / 190°C oven for twelve minutes, or until they’re turning very lightly golden.
At this point, you’ll remove them from the oven and coat them with another light layer of “egg wash.” Sprinkle them with sesame seeds, if you like—that’s how I ate the cookies growing up, and it’s a nice touch.
Return the cookies to the oven. Bake them for another 5-8 minutes, or until the cookies are golden brown all over.
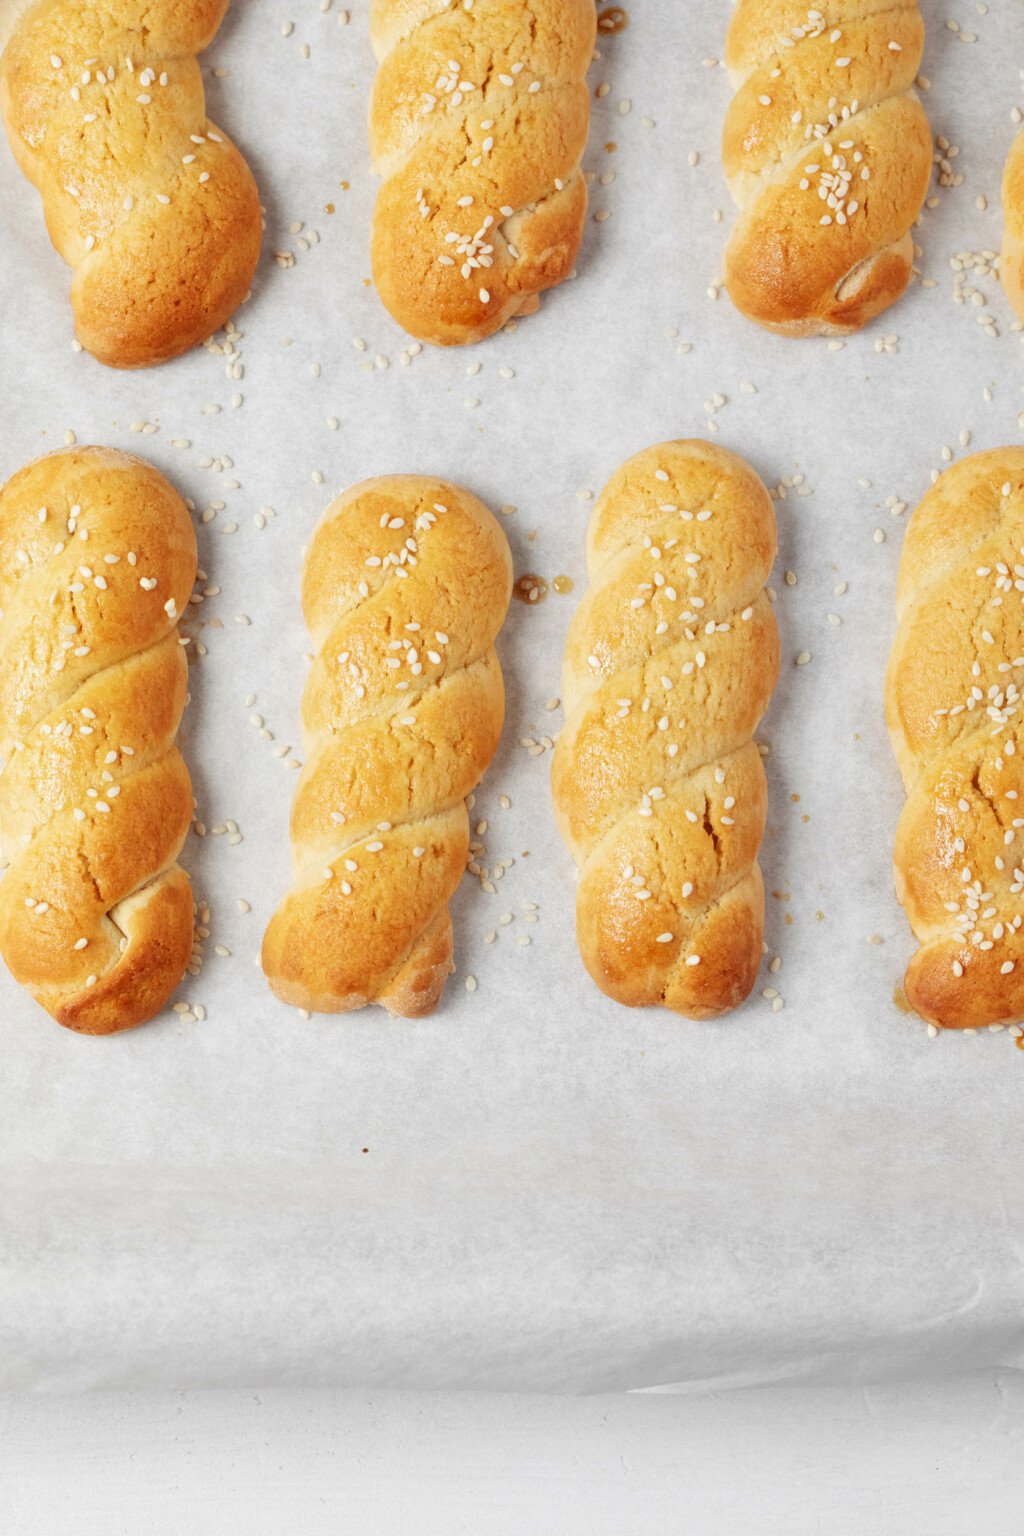
If you’re not sure whether or not the cookies are ready, remove them from the oven. Cookies bake more after they’re out of the oven, so it’s always better to under-bake rather than over-bake.
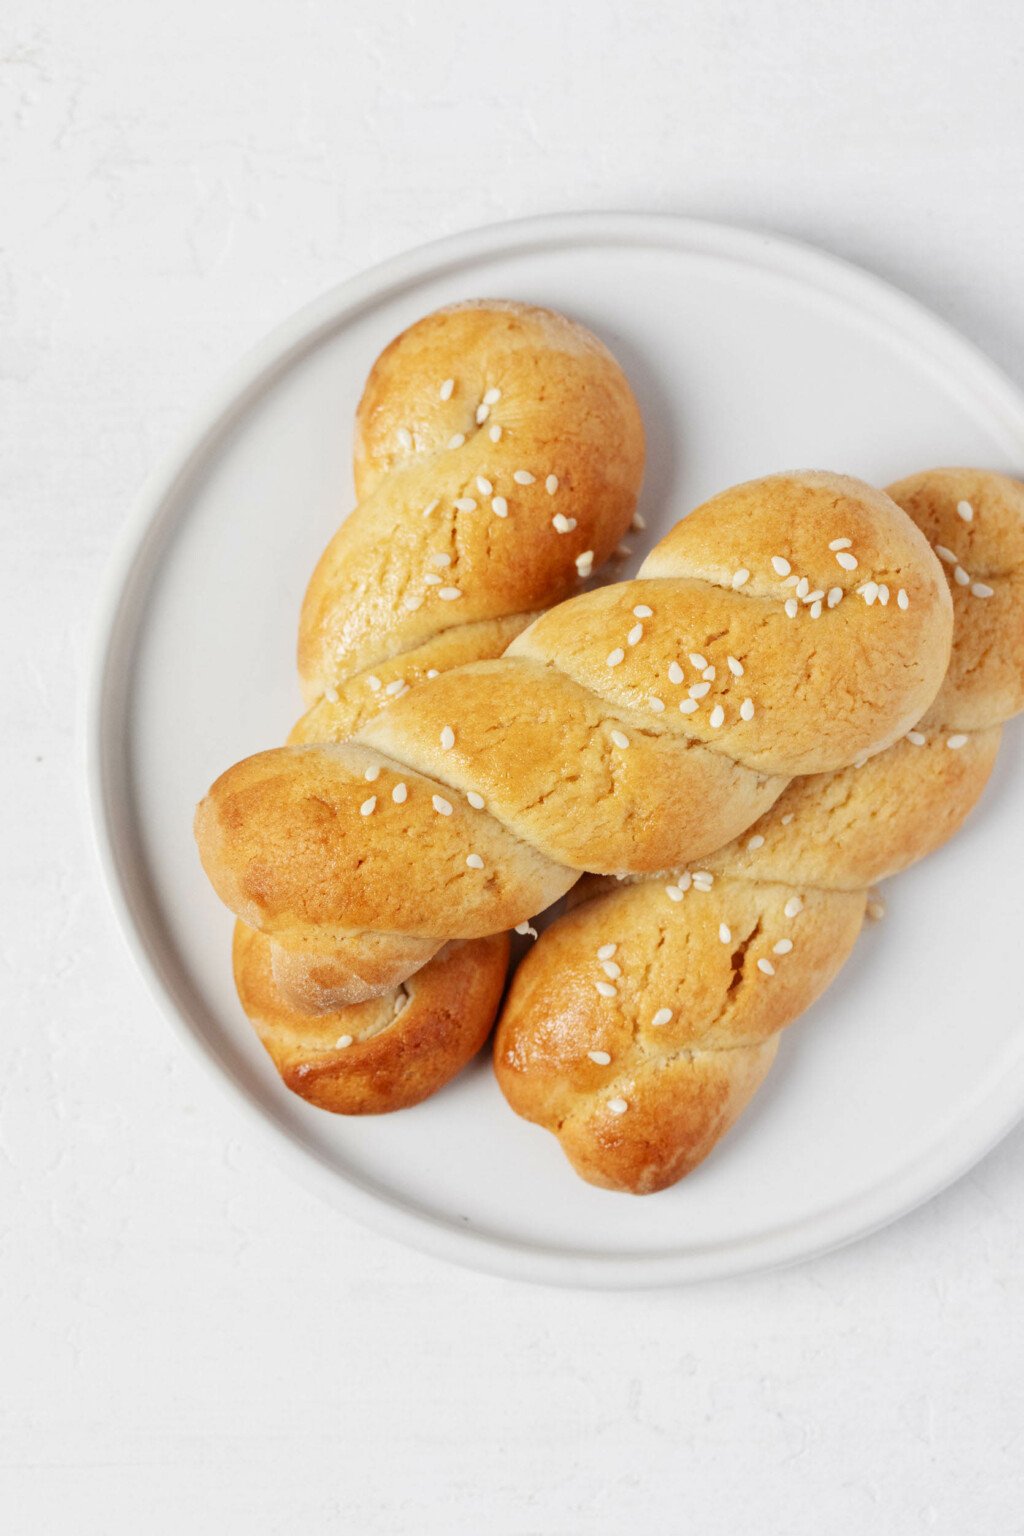
Step 8: Cool and enjoy
Finally, allow the cookies to cool on the sheet for 5 minutes, then transfer them to a wire cooling rack.
Cool them for another 15 minutes before enjoying. I love to have these cookies with a glass of plant milk, a warm cup of coffee, or as a snack, all on their own.
They also make for a lovely after dinner treat, which is how I always used to have them on Greek Easter.
Storage
Vegan koulourakia can be stored in an airtight container at room temperature for up to four days.
If you’d like to keep them longer, just pop them into an airtight container and freeze them for up to six weeks, defrosting at room temperature before enjoying.

More vegan Greek Easter recipes
If you also celebrate Greek Easter or Orthodox Easter, and you’re curious about vegan versions of traditional recipes, then here are a few others that my mom and I like to enjoy each year:
- Vegan tsoureki bread
- Vegan avgolemono soup
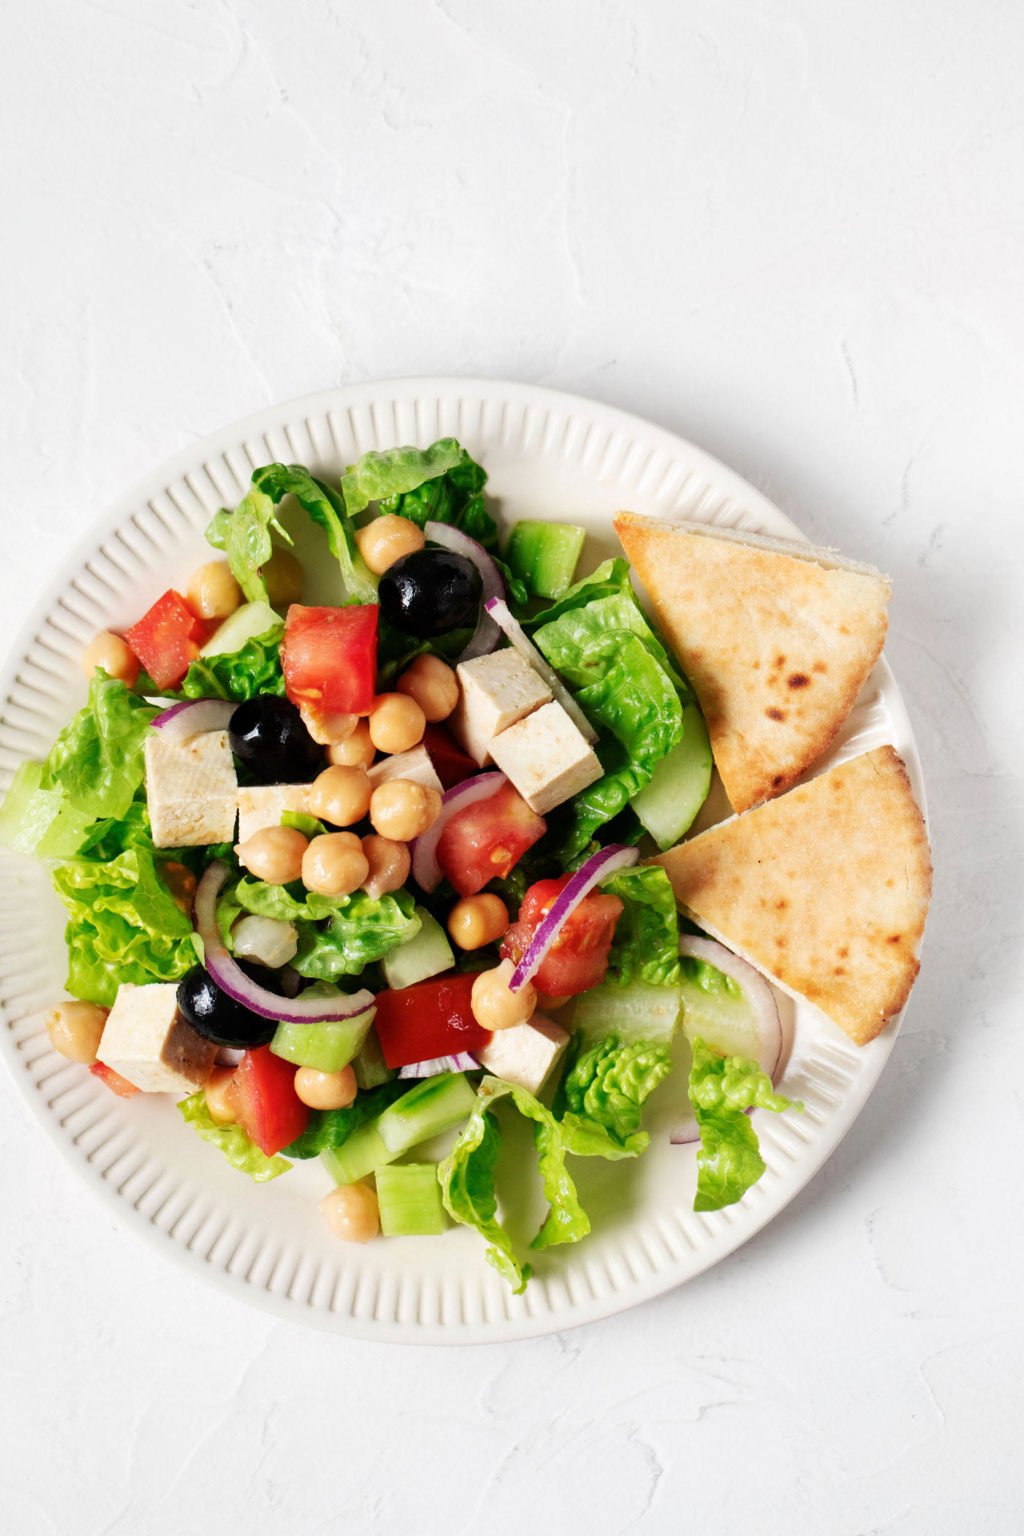
- Tofu feta kale salad
- Chickpea Greek salad
- Vegan feta pasta
- Greek vinaigrette
- Spring lemon orzo pasta salad
- Tomato orzo soup with kale
And here is my sweet new holiday tradition—starting tomorrow, on Orthodox Easter Sunday.
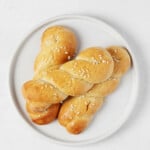
Vegan Koulourakia
Author –Yields: 25 cookies
Ingredients
For the cookies
- 3 1/2 cups unbleached, all-purpose flour (420g)
- 1 1/2 teaspoons baking powder
- 1/4 teaspoon fine salt
- 10 tablespoons vegan butter (140g)
- 3/4 cup cane sugar (150g)
- 1/4 cup aquafaba, lightly beaten (60ml)
- 1 1/2 teaspoons vanilla extract
- 1/2 teaspoon orange flavor (substitute 2 tablespoons finely grated orange zest, or omit)
- 1/2 cup plain soy, oat, cashew or almond milk, at room temperature (120ml)
For the vegan "egg wash" and decorating
- 2 tablespoons plain soy, oat, cashew or almond milk, at room temperature
- 1 1/2 tablespoons maple or agave syrup
- 2 tablespoons sesame seeds (optional, for decoration)
Instructions
Prepare the koulourakia dough
- In a large mixing bowl, whisk together the flour, baking powder, and salt.
- Place the butter and sugar into a stand mixer fitted with the paddle attachment. Cream the butter and sugar together on medium speed for 2-4 minutes, or until the mixture is pale yellow, light, and creamy. Alternatively, use a handheld mixer and mixing bowl and cream the butter and sugar for 2-3 minutes, or until that texture and appearance is achieved.
- Add the aquafaba, vanilla extract, orange extract or zest, milk to the mixer and mix on low speed for another half minute.
- Add the flour, baking powder, and salt to the mixer in a couple batches while the machine is on low speed. Keep mixing just until the flour is completely incorporated and a soft, sticky dough has formed; try to avoid over mixing. Cover the dough and refrigerate it for at least two hours and up to overnight.
Shape and bake
- Preheat the oven to 375F / 190C. Line a baking sheet with parchment paper or silpat.
- Lightly flour a clean, flat work surface. Gather up the dough a few tablespoons at a time. Roll the dough into a rope that’s about 8-in / 20cm long. Fold the rope in half and twist it to form a twisted rope shape. Transfer the cookie to the baking sheet. Repeat with all of the remaining dough. Space the cookies at least 1 inch / 2.5cm apart on the baking sheet.
- Whisk together the remaining 2 tablespoons non-dairy milk and the maple syrup together in a small bowl. Brush this mixture onto the tops of the cookies; you won’t use it all, so reserve the extra wash.
- Transfer the cookies to the oven and bake for 12 minutes, or until they’re turning very lightly golden. Remove the cookies from the oven and brush them with another layer of the milk and syrup “egg wash.” Sprinkle them with the sesame seeds, if using.
- Return the cookies to the oven for another 5-8 minutes, or until the cookies are golden brown all over. Check the cookies after 5 minutes and err on the side of removing them earlier rather than later, to avoid burning.
- Remove the cookies from the oven. Allow them to cool on the sheet for 5 minutes, then transfer them to a wire cooling rack. Cool for another 15 minutes before enjoying. Allow the cookies to cool entirely before storing them in an airtight container for up to four days. The cookies can also be frozen for up to 6 weeks.
Whether you’re Greek or not, I hope you’ll be intrigued enough by these lovely cookies to give them a try!
In the holiday spirit, I wish you a very sweet day.
xo
This post may contain affiliate links. If you use these links to buy something I may earn a commission. Visit my privacy policy to learn more.


Leave a Comment
Loved this recipe. The only change I made was to add a tablespoon of Cointreau. These Koulourakia were beautiful to behold, and delicious. Many thanks for sharing this recipe.
I’m so delighted that you like them, Gina, and Cointreau—what a great addition!
I was already planning on making your lemon orzo pasta salad for Sunday and am also going to make these! I already have what I need and will have time to shape/bake tomorrow morning. Also, somehow had no idea you had a vegan avgolemono! And every year I say I’m going to make the tsoureki but I’m so intimidated by it – and any bread -lol.
I hope you love the orzo, Mina! And hope you have an easy time with the cookies. I promise that, if you can make them, you can also make the tsoureki! Have a wonderful Greek Easter Sunday.