April 10, 2024
These sheet pan smashed broccoli florets have an irresistable, crisp-tender texture! If you’ve been looking for a flavorful and creative way to enjoy broccoli as a side dish or snack, then this recipe is for you. It’s easy and fun to prepare, and the recipe offers different seasoning options.
I’m not usually one to jump on viral food trends. The primary reason for this is that I’m not quick enough on the uptake.
The first time I made vegan baked feta pasta, for example, was about two years after it first started trending.
However, that feta pasta is an example of a food trend that became popular for good reasons: great flavor and a cooking method that was both ingenious and time-saving.
It proved to me that viral recipes can be really worthy—they can become timeless keepers, in fact—whether I make them while they’re popular or not.
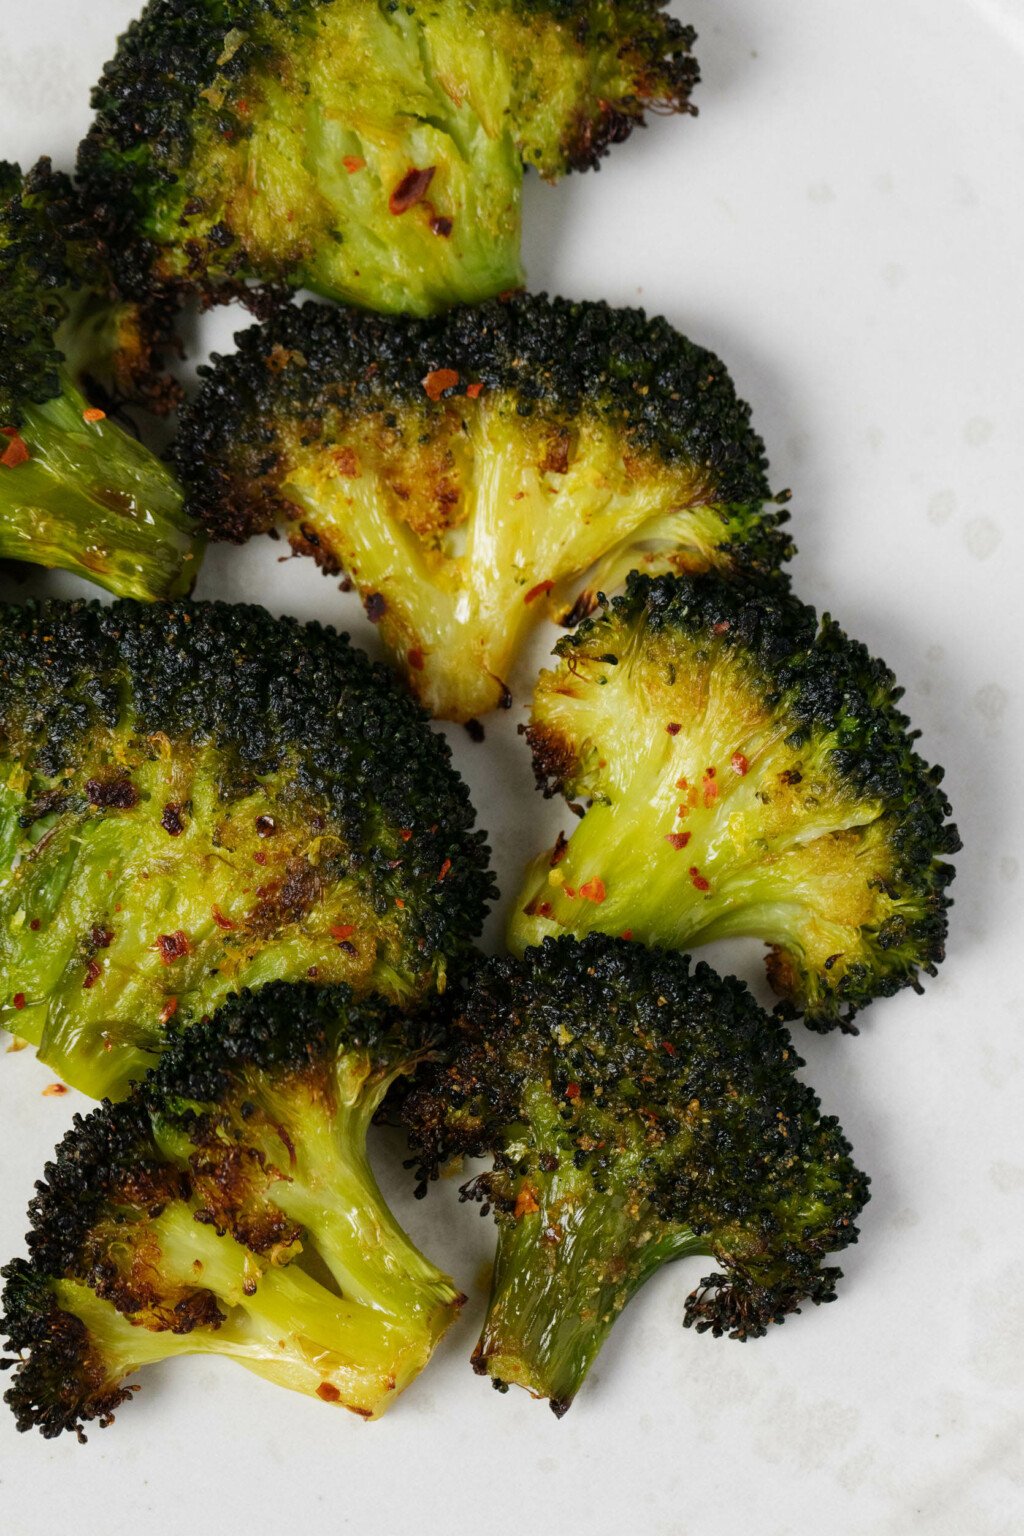
Today, I’m sharing an equally playful recipe with unexpectedly great results: sheet-pan smashed broccoli florets.
My recipe for smashed broccoli is easy and fun. It creates florets that have the tenderness of steamed broccoli, but the crispy edges of roasted broccoli.
On top of that, the florets are super delicious. I’m excited to tell you about them.
What is smashed broccoli?
Even if you’ve never heard of smashed broccoli, it’s possible that you have heard of a related recipe: smashed potatoes.
The concept behind both recipes is the same. First, you par-cook a vegetable, so that it’s not quite ready to eat, but it’s tender enough to smash.
Then, you “smash” the veggie with something—I use either the bottom of a drinking glass or the bottom of a mason jar.
This flattens the vegetable, making it sort of like a big, tender “chip.” It also increases surface area, so there’s more opportunity to brush or sprinkle the vegetable with toppings or seasonings.
You may be wondering whether or not the effort is worthwhile. Mightn’t it be enough to just roast broccoli florets instead?
Actually, I think smashing is very worthwhile!
I like roasted broccoli, but it’s very different from these smashed florets. Roasted broccoli is super crispy; sometimes it’s even too crispy for my taste.
On the other hand, steamed broccoli—which is one of my go-to vegetable side dishes and a favorite food, period—has no crunch or crispiness at all.
Smashed broccoli is sort of the best of both worlds. The florets are super tender, yet their edges have delightful crispiness.
They really are unique. The process of making them is not only unique, but fun, too.
How to make smashed broccoli florets
“Smashing” the broccoli happens in a few steps. First, you’ll steam the florets just enough to tenderize them.
Then comes smashing and seasoning.
Finally, you’ll roast the florets on a sheet pan. You have the option to add extra seasoning a few minutes before the florets finish roasting; I’ve included my favorite options.
Step 1: Steam
The goal of the steaming step is to cook the broccoli so that it’s fork tender, yet not enough for it to be mushy. I find that 4-5 minutes is the right amount of time.
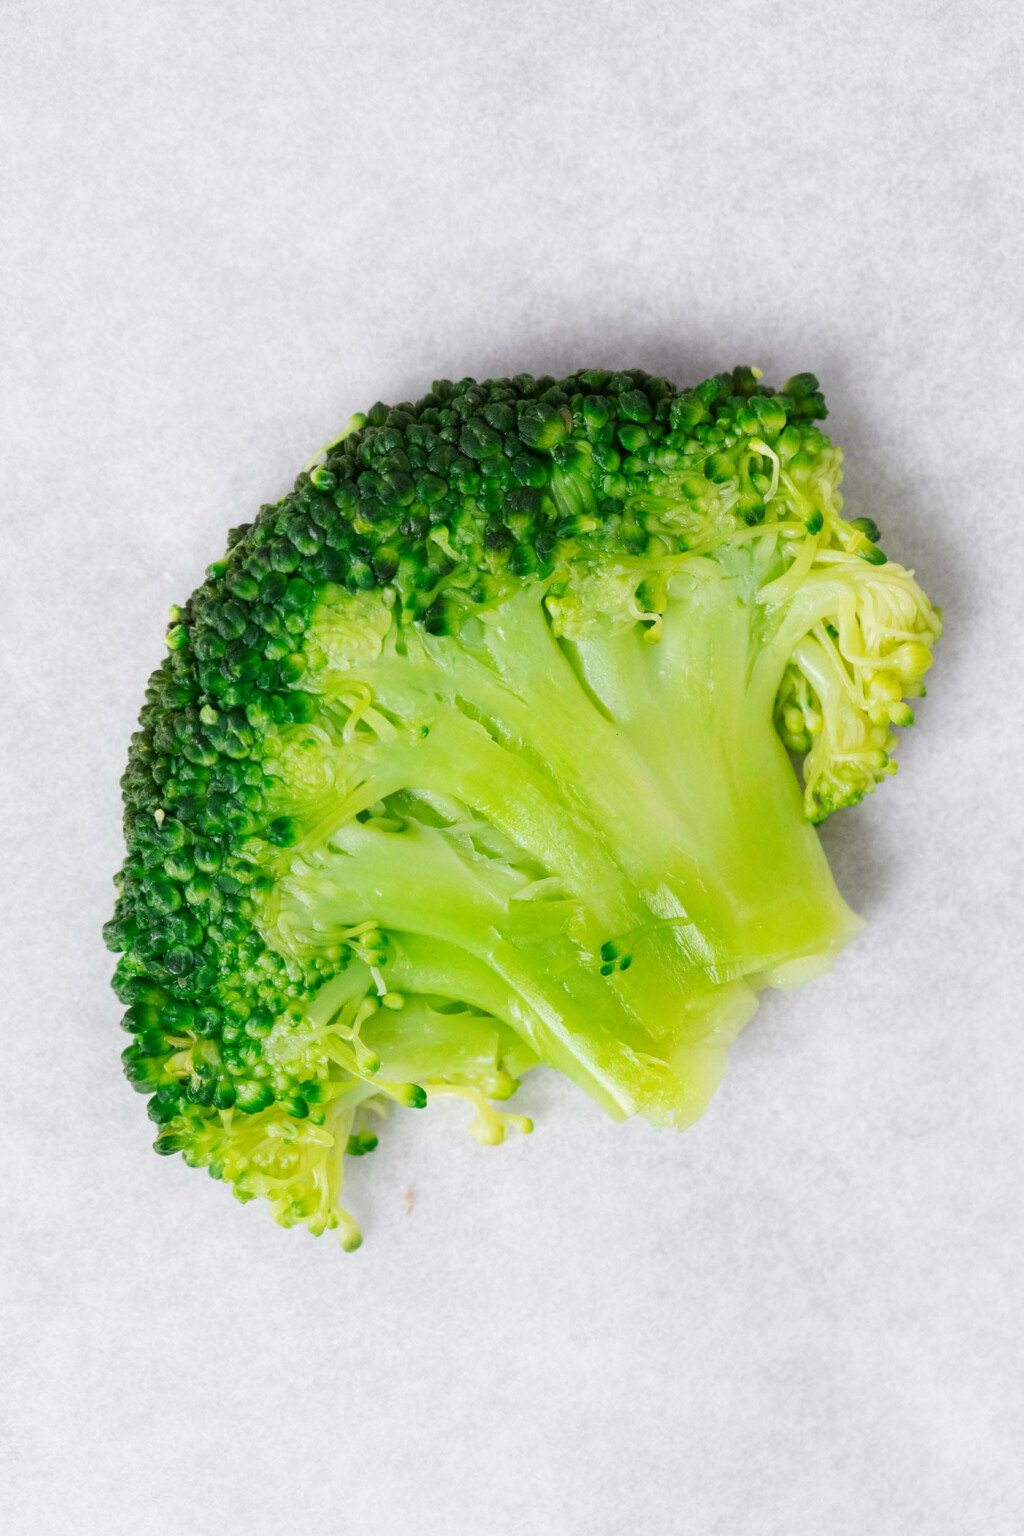
Step 2: Smash
Next comes the fun part: smashing!
But before you smash, you’ll need to pat the florets dry.
I do this by transferring my steamed florets to a flat surface that I’ve lined with tea towels or paper towels. I press and pat them gently to remove as much moisture as I can.
Next, you’ll transfer the florets to a parchment-lined baking sheet. Grab a drinking glass or a mason jar—whichever you have on hand—and use the bottom to “smash,” or flatten the florets.
This may require a little pressure. The goal is to flatten the florets gently, but not to pound on them so that they start to fall apart.
After this, you’ll want to use another paper towel or tea towel to pat the flattened florets dry once again. They should be as dry as possible before you season them.
Step 3: Season
Now it’s time to season the smashed broccoli florets.
I tried doing this in a few different ways. I drizzled them with oil then used my hands to coat them; in another trial, I used cooking oil spray. After that, I sprinkled salt and garlic powder on top.
The best method I found was inspired by Nicole’s recipe: to mix the olive oil with garlic powder and salt before gently brushing it onto the florets.
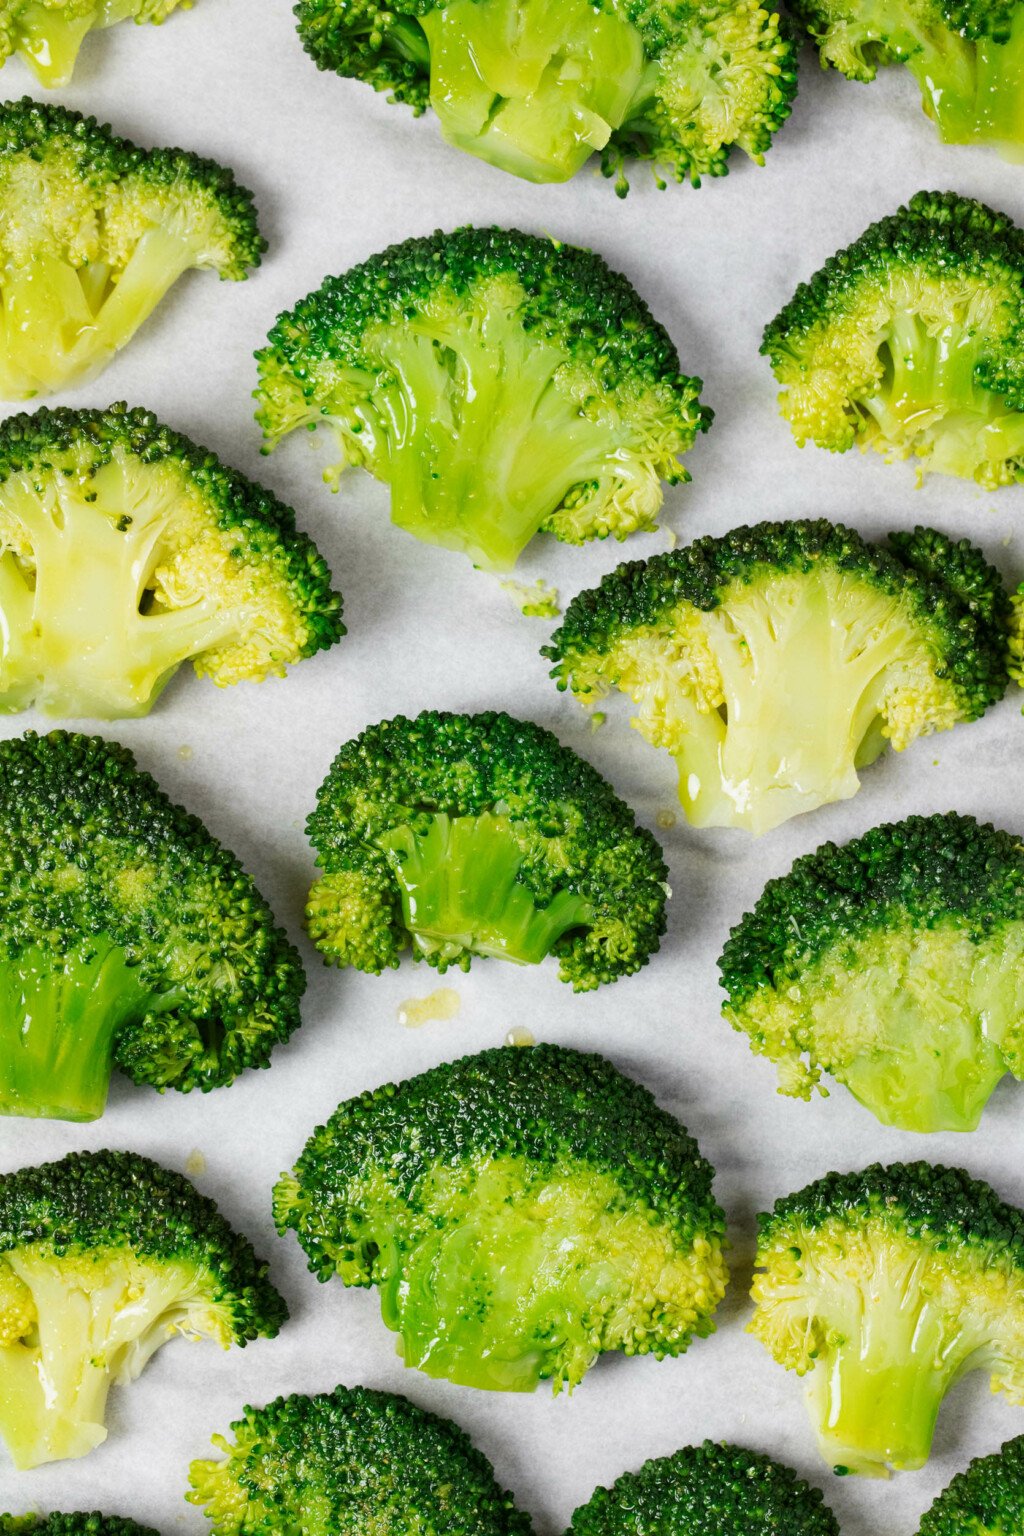
I found that this seasoned them most effectively and consistently, resulting in perfectly garlicky, salty pieces.
Step 4: Roast
Next, you’ll transfer the florets to a pre-heated oven for roasting.
They’ll need 15-18 minutes at 400°F/200°C, or until the florets are sizzling and turning golden. But they’re not quite ready yet!
At this point, you’ll remove the florets from the oven and season you can season them again, this time with additional toppings of your choise.
I give three options:
- Lemon juice and zest
- Crushed red pepper flakes
- Vegan parmesan cheese
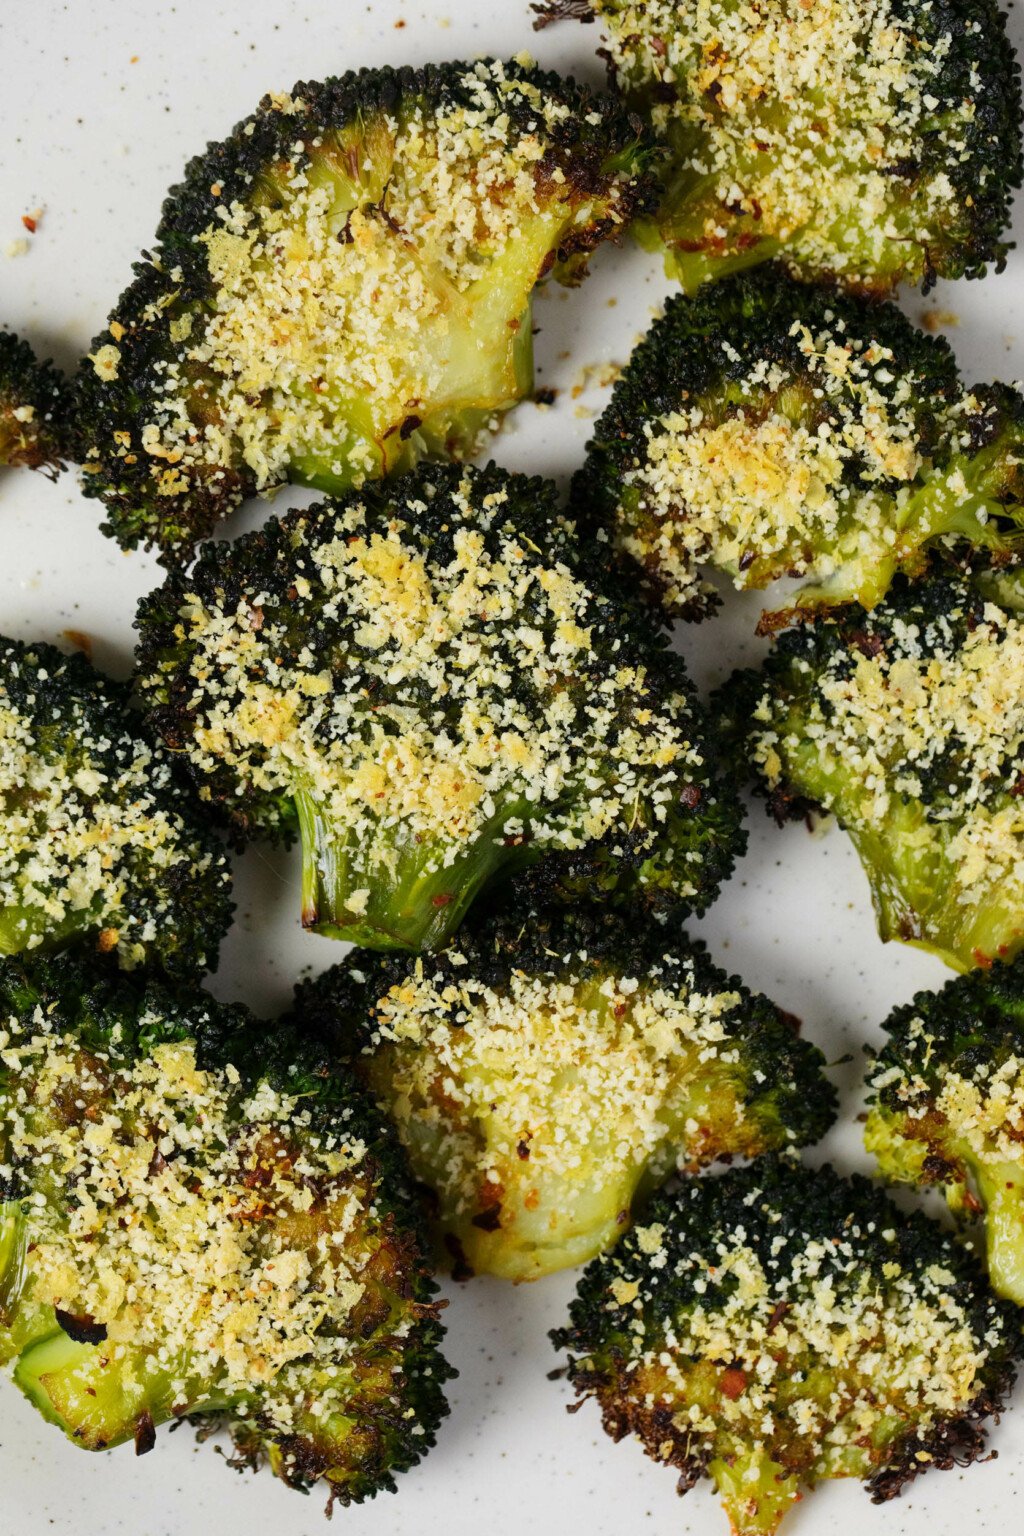

All of these options are nice in different ways. Cashew parmesan adds some texture and savoriness.
Lemon juice and zest, of course, adds brightness and acidity.
Finally, the crushed red pepper adds some heat.
If none of these flavor profiles appeals, you could of course explore some other seasonings. A few additional ideas that come to mind:
- A dusting of za’atar or dukkah
- Baste the florets with buffalo sauce or drizzle them with hot sauce
- Brush the florets lightly with harissa
- Sprinkle the florets with Italian seasoning or herbes de Provence
- Spoon vegan yellow cheese sauce generously over the broccoli
Return the florets to the oven and bake them for five more minutes, or until they’re browning and quite crispy on the sides.
They should at this point also be extremely tender in the center, too.
Give the florets a finishing sprinkle of sea salt, a drizzle of extra olive oil, or any other desired touches. They’re now ready to eat.
Can I prepare the recipe with frozen broccoli?
It’s no secret that I am a huge lover of frozen veggies. I whip up bags of frozen green beans, peas, carrots, and corn all the time, topping them simply with a little vegan butter and salt.
If frozen cauliflower is what I have, then it usually becomes roasted frozen cauliflower florets.

The Vegan Week
Embrace the joy of eating homemade food every day with the hearty and wholesome recipes in The Vegan Week.
Whether you have three, two, or even just one hour of time to spare, The Vegan Week will show you how to batch cook varied, colorful, and comforting dishes over the weekend.
And I’m almost never without a bag of frozen broccoli florets to play around with.
Very often, these get turned into the From-Frozen Roasted Broccoli from The Vegan Week.
For a different approach, you can cook the florets as instructed on the frozen package, dry them as much as humanly possible, then proceed with the smashing and seasoning steps above.
The results will be very similar to those achieved with using fresh broccoli. And the recipe will be doable whether you’ve remembered to shop for produce recently or not!
Storage
You can store the sheet-pan smashed broccoli florets in an airtight container in the fridge for up to three days.
I find that the texture is compromised through freezing and defrosting, so this is one veggie side dish that I don’t recommend freezing.

Serving suggestions
The smashed broccoli florets are really intended to be a side dish or a snack.
If you make them into a side dish, you can serve them with any vegan main dish or combination of simple proteins or grain dishes.
If you’d like to snack on the florets, then I highly recommend a dipping sauce to go along with them! Here are a few ideas:
- Yum sauce
- Homemade vegan ranch dressing
- Dijon lemon tahini dressing
- Vegan mayo (homemade!)
- Yellow cheese sauce
- Cashew queso sauce
- Vegan pesto with basil and cashews
The florets ought to be very flavorful all on their own—that’s the point of adding seasoning—but the addition of a stellar sauce can’t hurt.
Here’s the recipe in its entirety.

Sheet Pan Smashed Broccoli Florets (Crisp-Tender!)
Author –Yields: 4 servings
Ingredients
- 1 large or 2 smaller crowns broccoli, cut into large florets* (2-3 inches, or 5-7.5cm)
- 2 tablespoons olive oil or avocado oil (plus any extra you might want for finishing)
- 1/2 teaspoon garlic powder
- 1/8 teaspoon fine salt (plus any extra you might want for finishing)
- Crushed red pepper flakes or freshly ground black pepper, to taste
- Optional: 1 lemon, juice and zest
- Optional: 3 tablespoons Cashew Parmesan Cheese
Instructions
- Preheat the oven to 400°F/200°C and line a rimmed baking sheet with parchment paper.
- Fill a pot of water with a few inches of water and fit it with a steamer attachment. Bring the water to a boil and add the florets to the steamer. Steam the broccoli florets for 4-5 minutes, or until they're tender and can be pierced pretty easily with a fork, but not mushy. Remove the steamer basket from heat.
- Transfer the florets to a flat surface that has been lined with tea towels or paper towels. Pat the florets very dry. Transfer them to the parchment-lined baking sheet.
- Use the bottom of an average, flat-bottomed drinking glass or mason jar to smash the florets until they are considerably flattened, but not broken or falling apart. They should be 1/4-1/2 inch (6mm-1.3cm) thick. If they release any additional moisture when you smash them, use a paper towel to pat them dry again on the baking sheet. The smashed florets should be as dry as possible.
- Whisk the oil, garlic powder, and salt together in a small bowl. Use a pastry or basting brush to brush this mixture over the tops of the florets, coating them quite well. Add crushed red pepper flakes or freshly ground black pepper as desired.
- Transfer the broccoli to the oven and bake for 15-18 minutes, or until the florets are sizzling and turning golden. Remove the sheet from the oven and add finishing seasonings as desired: a squeeze of lemon juice and sprinkle of lemon zest, or a few tablespoons of cashew parmesan, sprinkled over the florets.
- Return the florets to the oven and bake for 5-7 more minutes, or until the florets are crispy and browning at the edges. If you like, finish them with one final sprinkle of salt and/or an extra drizzle of olive oil. Enjoy.
Notes
Alternatively, use a 12-16 ounce / 340-450g bag of frozen broccoli florets. Instead of steaming as described, cook the florets from frozen as directed on the package. Then proceed with the recipe as written.
In just a moment, I’ll be grabbing a bag of frozen broccoli florets from my freezer and using them to prepare the recipe.
I haven’t done extensive vegan meal prep for this week, and I’m also in a phase of “shopping the pantry/freezer” in order to clear some room for new supplies.
I could very well just serve the defrosted and cooked florets with vegan butter and salt, as I have done many times before. And that would be fine.
But it’s nice to have a more inspired preparation method planned. The florets will make an otherwise sort of humdrum food week feel a little zestier and more flavorful.
It’s proof that small ingredient tweaks and fresh preparation methods can make a big difference! I hope you’ll be similarly pleased by this idea and the tasty green vegetable that it creates.
xo
This post may contain affiliate links. If you use these links to buy something I may earn a commission. Visit my privacy policy to learn more.
Categories: Side Dishes,
Snacks
Method: Oven, Sheet Pan Meals
Ingredients: Broccoli
Dietary Preferences: Gluten Free, Soy Free, Tree Nut Free, Vegan
Recipe Features: Meal Prep
Method: Oven, Sheet Pan Meals
Ingredients: Broccoli
Dietary Preferences: Gluten Free, Soy Free, Tree Nut Free, Vegan
Recipe Features: Meal Prep


Leave a Comment